Deploying an existing Django project on PythonAnywhere

Deploying a Django project on PythonAnywhere is a straightforward process. PythonAnywhere provides a platform for hosting web applications and is well-suited for hosting Django projects. Here’s a step-by-step guide to deploying your Django project on PythonAnywhere:

Step 1: Sign Up for a PythonAnywhere Account

If you don’t already have an account on PythonAnywhere, sign up for a free or paid account. Free accounts have some limitations, so consider a paid plan for a production application.

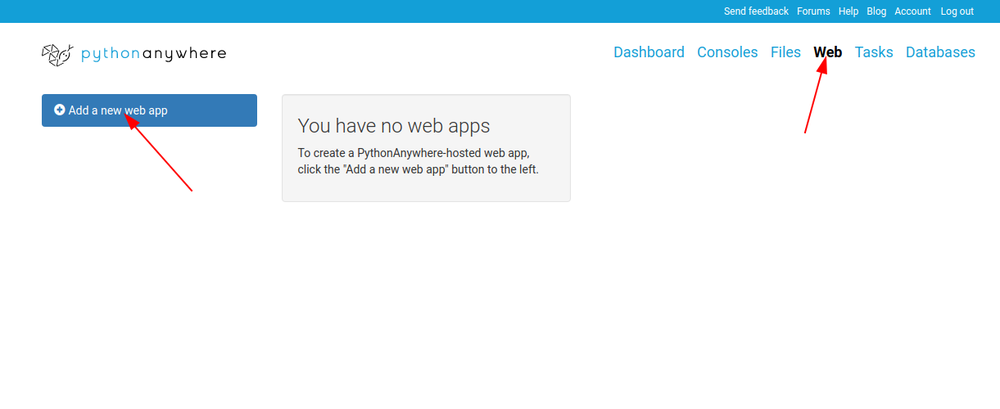
After login into PythonAnywhere you will see screen as below:

Step 2: You need to upload your project on GitHub for clone and copy the HTTPS link for clone.


Step 3: Clone Your Django Project

You need to clone your Django project’s code repository into your PythonAnywhere account. To do this, you can use the built-in bash console on PythonAnywhere.

  1. Open a bash console on PythonAnywhere.

  2. Navigate to your project directory or create one if you haven’t already.

  3. Clone your project’s Git repository as below:


					git clone https://github.com/myusername/myproject.git
				
			
Step 4: Set Up a Virtual Environment

It’s best practice to use a virtual environment to manage your project’s dependencies.

1. Create a virtual environment in your project directory.


					virtualenv venv --python=python3.7


2. Activate the virtual environment.

				
					source venv/bin/activate


Step 5: Install Dependencies

First go to your root directory by command cd then install requirements.

Install the required Python packages for your Django project. You can do this using pip

				
					pip install -r requirements.txt


TIP: if you see an error saying mkvirtualenv: command not found, check out InstallingVirtualenvWrapper.

For example:


Step 6: Create and Configure the Web App on PythonAnywhere

Head over to the Web tab and create a new web app, choose the “Manual Configuration” option and the right version of Python (the same one you used to create your virtualenv).

NOTE: Make sure you choose Manual Configuration, not the “Django” option, that’s for new projects only.

Click Next button on the first popup “Your web app’s domain name”:

pythonanywhere_6.png

On next window, be sure you choose the ‘Manual configuration’ option:pythonanywhere_8.png

Then choose the right Python version:pythonanywhere_9.png

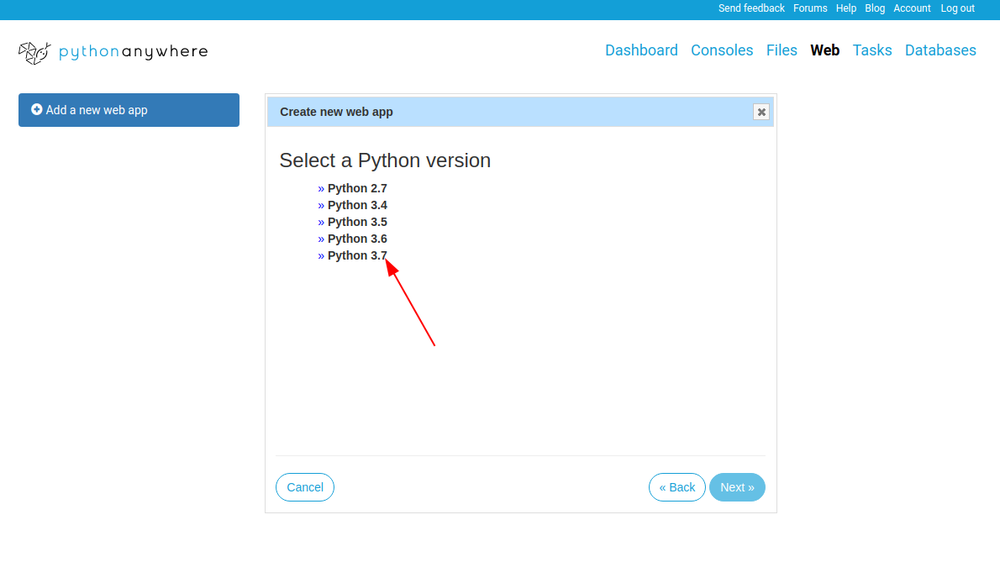
On the last screen just click Next:
pythonanywhere_10.png

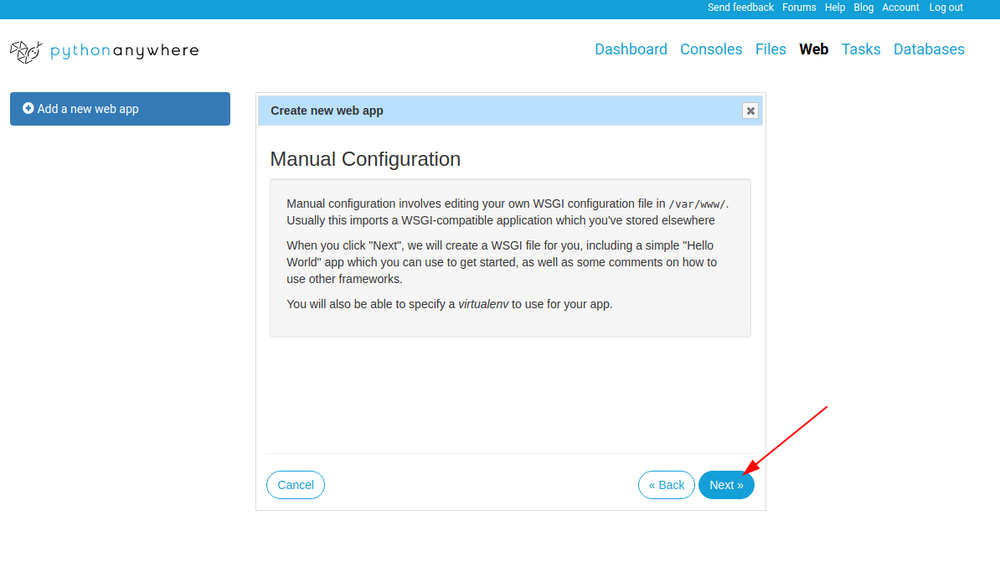
And you should get a configuration site:

Now ( on the configuration page – Web tab) find virtualenv option and enter your virtualenv name (whole path):

You can just use its short name “mysite-virtualenv”, and it will automatically complete to its full path in /home/username/.virtualenvs.

Step 7: Edit your WSGI file

Path are mention below ,need to noted down

  1. The path to your Django project’s top folder — the folder that contains “manage.py”, eg /home/myusername/mysite
  2. The name of your project (that’s the name of the folder that contains your settings.py), eg mysite
  3. The name of your virtualenv, eg mysite-virtualenv

One thing that’s important here: your Django project (if you’re using a recent version of Django) will have a file inside it called wsgi.py. This is not the one you need to change to set things up on PythonAnywhere — the system here ignores that file.

Instead, the WSGI file to change is the one that has a link inside the “Code” section of the          Web tab — it will have a name something like /var/www/yourusername_pythonanywhere_com_wsgi.py or /var/www/www_yourdomain_com_wsgi.py.Click on the WSGI file link, and it will take you to an editor where you can change it.

You can get the location of your project in bash by using pwd command

Delete everything except the Django section and then uncomment that section. Your WSGI file should look something like this: 

				
					# +++++++++++ DJANGO +++++++++++
# To use your own Django app use code like this:
import os
import sys

# assuming your Django settings file is at '/home/myusername/mysite/mysite/settings.py'
path = '/home/myusername/project'
if path not in sys.path:
    sys.path.insert(0, path)

os.environ['DJANGO_SETTINGS_MODULE'] = 'app.settings'

## Uncomment the lines below depending on your Django version
###### then, for Django >=1.5:
from django.core.wsgi import get_wsgi_application
application = get_wsgi_application()
###### or, for older Django <=1.4
#import django.core.handlers.wsgi
#application = django.core.handlers.wsgi.WSGIHandler()


Be sure to substitute the correct path to your project, the folder that contains manage.py, which you noted above.

Don’t forget to substitute in your own username too!

Also make sure you put the correct value for DJANGO_SETTINGS_MODULE, where your settings.py file is contain.

This guide assumes you’re using a recent version of Django, so leave the old wsgi.WSGIHandler() code commented out, or better still, delete it.

Save the file, then go and hit the Reload button for your domain. (You’ll find one at the top right of the wsgi file editor, or you can go back to the main web tab)

Step 8: Other Settings.

Open the setting.py file in our project and search Allowed host[]:-

Allowed host =[‘your-username-project’] 

You can get this link at the web tab in the PythonAnywhere as below:

Static and Templates:

Check the static file location and templates location in the bash by go to directory through cd and running the command ls

Replace these location in the settings.py with respective static and template section.

STATIC_URL  and STATICFILES_DIRS are as it is , as we save before deployment.

For Example:

				
					STATIC_URL = '/static/'
STATICFILES_DIRS = (
    # location of your application, should not be public web accessible
    './static'
)


Check the same for the templates and add into settings file.

‘DIRS’ path should be where your template folder right now. 

For Example:

				
					TEMPLATES = [
    {
        'BACKEND': 'django.template.backends.django.DjangoTemplates',
        'DIRS': ['/home/myusername/myproject/templates'],
        'APP_DIRS': True,
        'OPTIONS': {
            'context_processors': [
                'django.template.context_processors.debug',
                'django.template.context_processors.request',
                'django.contrib.auth.context_processors.auth',
                'django.contrib.messages.context_processors.messages',
            ],
        },
    },
]


Set up a static files mapping

Finally, set up a static files mapping to get our web servers to serve out your static files for you.

  • Go to the Web tab on the PythonAnywhere dashboard
  • Go to the Static Files section
  • Enter the same URL as STATIC_URL in the url section (typically, /static/)
  • Enter the path from root directory to static into the path section (the full path, including /home/username/etc)
    for Example:  /home/myusername/myproject/static/

Then hit Reload and test your static file mapping by going to retrieve a known static file.

Eg, if you have a file at /home/myusername/myproject/static/css/base.css, go visit http://www.your-domain.com/static/css/base.css

You can do those this with the Media also respective

Reload app in Web tab and test your static file mapping by going to retrieve a known static file.

Database Setup:

If, like most sites, your site uses a database, you’ll need to set that up. Go to the Consoles tab, start a bash console, use cd to navigate to the directory where your Django project’s manage.py lives, then run:

				
					python manage.py makemigrations
python manage.py migrate
				
			
You can go and Reload the file at Web and Click on the User-name_Project.com
Well done!! The whole world can see now your own Django website.
Tech Amplifier Final Logo