
Building an Instagram Clone Using Django
Introduction
Instagram is one of the most popular social media platforms, allowing users to share photos, videos, and stories. In this blog, we’ll build a simplified version of Instagram using Django. The project will include features like:
- User Authentication: Register, login, and logout.
- Post Creation: Upload images with captions and hashtags.
- Dark Mode Toggle: Switch between light and dark themes.
- Profile Editing: Update Profile picture, Bio and website
- Comments and Likes: Interact with posts.
- Followers and Following: Build a social network.
- Reels: Upload and view short videos.
- Messaging: Chat with other users.
- Stories: Share temporary photos and videos.
This blog will guide you through the implementation of each feature step by step. By the end, you’ll have a fully functional Instagram clone!
Technologies Used
- Backend: Django (Python)
- Frontend: HTML, CSS, JavaScript, Bootstrap
- Database: SQLite (for development)
Other Libraries: Pillow (for image handling), Django Signals (for automatic profile creation)
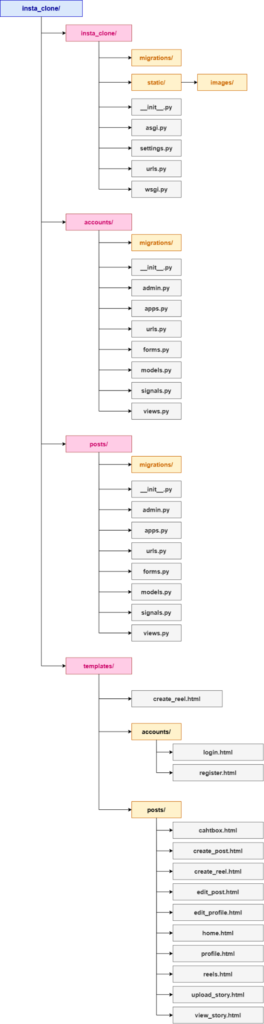
File Structure
Here’s an overview of the project structure:
Setup Instructions
Before we start coding, let’s set up the project environment.
1.Create a Virtual Environment:
					python -m venv venv
source venv/bin/activate  # On Windows: venv\Scripts\activate
2.Install Django:
pip install django
3.Create the Django Project:
					django-admin startproject insta_clone
cd insta_clone
4.Create the Apps:
					python manage.py startapp accounts
python manage.py startapp posts
5.Install Pillow (for image handling):
pip install pillow
6.Add Apps to INSTALLED_APPS:
- Open insta_clone/settings.py and add accounts and posts to INSTALLED_APPS:
					INSTALLED_APPS = [
    ...
    'accounts',
    'posts',
]
7.Run Migrations:
python manage.py migrate
Static Files and Images
The project uses static files (CSS, JavaScript, and images) to style the frontend. Here’s how to set it up:
- Create a Static Folder:
- Inside the root project directory (insta_clone), create a folder named static.
- Inside the static folder, create another folder named images.
- Add Static Files:
- Place your CSS and JavaScript files in the static folder.
- Download appropriate images (e.g., Instagram logos, icons, etc.) from the internet and place them in the static/images folder.
- Configure Static Files in settings.py:
Add the following lines to settings.py to serve static files during development:
					STATIC_URL = '/static/'
STATICFILES_DIRS = [
    os.path.join(BASE_DIR, 'static'),
]
4. Using Static Files in Templates:
Load static files in your templates using the {% load static %} tag. For example:
<img decoding="async" src="{% static 'images/instagram.png' %}" alt="Instagram Logo">
Note: You can download images like the Instagram logo, app store badges, and other icons from the internet and place them in the static/images folder. Just as I did for my project
Feature 1: User Authentication
1.Custom User Model
To use email-based authentication, we’ll create a custom user model in accounts/models.py:
					from django.contrib.auth.models import AbstractUser
from django.db import models

class CustomUser(AbstractUser):
    email = models.EmailField(unique=True)
    USERNAME_FIELD = 'email'  # Use email for login
    REQUIRED_FIELDS = ['username']

    def __str__(self):
        return self.email
Update settings.py to use the custom user model:
AUTH_USER_MODEL = 'accounts.CustomUser'
Run migrations to apply the changes:
					python manage.py makemigrations
python manage.py migrate
2.User Registration
Create a registration form in accounts/forms.py:
					from django import forms
from django.contrib.auth.forms import UserCreationForm
from .models import CustomUser

class RegisterForm(UserCreationForm):
    email = forms.EmailField(required=True)

    class Meta:
        model = CustomUser
        fields = ['username', 'email', 'password1', 'password2']

Add the registration view in accounts/views.py:

from django.shortcuts import render, redirect
from .forms import RegisterForm

def register(request):
    if request.method == "POST":
        form = RegisterForm(request.POST)
        if form.is_valid():
            user = form.save()
            login(request, user)
            return redirect('home')
    else:
        form = RegisterForm()
    return render(request, 'accounts/register.html', {'form': form})
3.User Login:
Create a login form in accounts/forms.py:
					from django import forms
from django.contrib.auth.forms import AuthenticationForm

class LoginForm(AuthenticationForm):
    username = forms.EmailField(label="Email")  # Use email for login
Add the login view in accounts/views.py:
python
Copy
from django.contrib.auth import login, authenticate
from .forms import LoginForm

def login_view(request):
    if request.method == "POST":
        email = request.POST.get("email")
        password = request.POST.get("password")
        user = authenticate(request, email=email, password=password)
        if user:
            login(request, user)
            return redirect("home")
        else:
            return render(request, "accounts/login.html", {"error": "Invalid email or password."})
    return render(request, "accounts/login.html")
4. User Logout
Add the logout view in accounts/views.py:
					from django.contrib.auth import logout

def logout_view(request):
    logout(request)
    return redirect('index')
5.Templates
- register.html: Registration form template.
- login.html: Login form template.
- index.html: Homepage with login and registration links.
Templates/accounts/register.html:
{% load static %}
<!DOCTYPE html>
<html lang=”en”>
<head>
<title>Instagram – Sign Up</title>
<link rel=”stylesheet” href=”https://cdn.jsdelivr.net/npm/bootstrap@5.3.0/dist/css/bootstrap.min.css”>
<script src=”https://cdn.jsdelivr.net/npm/bootstrap@5.3.0/dist/js/bootstrap.bundle.min.js”></script>
<style>
body {
background-color: #fafafa;
display: flex;
justify-content: center;
align-items: center;
height: 100vh;
flex-direction: column;
}
.register-container {
background: white;
padding: 30px;
border-radius: 10px;
border: 1px solid #ddd;
width: 350px;
text-align: center;
}
.register-container img {
width: 200px;
margin-bottom: 10px;
}
.text-muted {
font-size: 14px;
margin-bottom: 10px;
}
.form-group {
margin-bottom: 12px;
}
.form-control {
font-size: 14px;
padding: 10px;
border-radius: 5px;
}
.btn-primary {
width: 100%;
font-size: 14px;
font-weight: bold;
padding: 8px;
margin-top: 10px;
}
.login-link {
margin-top: 15px;
font-size: 14px;
}
.separator {
display: flex;
align-items: center;
text-align: center;
margin: 15px 0;
}
.separator::before,
.separator::after {
content: “”;
flex: 1;
border-bottom: 1px solid #ddd;
}
.separator span {
padding: 0 10px;
font-size: 12px;
color: #aaa;
}
.signup-footer {
margin-top: 20px;
font-size: 14px;
text-align: center;
}
</style>
</head>
					<body>
    <section style="display: flex;">
        <img decoding="async" src="{% static 'images/loginregister.png' %}" alt="">
    <div class="register-container">
        <img decoding="async" src="{% static 'images/instagram.png' %}" alt="Instagram">
        <h1 style="font-family: 'Billabong', cursive;">Instagram</h1>
        <p class="text-muted">Sign up to see photos and videos from your friends.</p>

        <form method="POST">
            {% csrf_token %}

            <div class="form-group">
                <input type="text" name="username" id="id_username" class="form-control" placeholder="Username" required>
            </div>

            <div class="form-group">
                <input type="email" name="email" id="id_email" class="form-control" placeholder="Email" required>
            </div>

            <div class="form-group">
                <input type="password" name="password1" id="id_password1" class="form-control" placeholder="Password" required>
            </div>

            <div class="form-group">
                <input type="password" name="password2" id="id_password2" class="form-control" placeholder="Confirm Password" required>
            </div>

            <button type="submit" class="btn btn-primary">Sign Up</button>
        </form>

        <div class="separator"><span>OR</span></div>

        <p class="login-link">Already have an account? <a href="{% url 'login' %}">Log in</a></p>
    </div>

    </section>
    <div class="signup-footer">
        <p>Get the app.</p>
        <img decoding="async" src="{% static 'images/app_store_badge.png' %}" alt="App Store" width="120">
        <img decoding="async" src="{% static 'images/google_play_badge.png' %}" alt="Google Play" width="120">
    </div> <script data-no-optimize="1">window.lazyLoadOptions=Object.assign({},{threshold:300},window.lazyLoadOptions||{});!function(t,e){"object"==typeof exports&&"undefined"!=typeof module?module.exports=e():"function"==typeof define&&define.amd?define(e):(t="undefined"!=typeof globalThis?globalThis:t||self).LazyLoad=e()}(this,function(){"use strict";function e(){return(e=Object.assign||function(t){for(var e=1;e<arguments.length;e++){var n,a=arguments[e];for(n in a)Object.prototype.hasOwnProperty.call(a,n)&&(t[n]=a[n])}return t}).apply(this,arguments)}function o(t){return e({},at,t)}function l(t,e){return t.getAttribute(gt+e)}function c(t){return l(t,vt)}function s(t,e){return function(t,e,n){e=gt+e;null!==n?t.setAttribute(e,n):t.removeAttribute(e)}(t,vt,e)}function i(t){return s(t,null),0}function r(t){return null===c(t)}function u(t){return c(t)===_t}function d(t,e,n,a){t&&(void 0===a?void 0===n?t(e):t(e,n):t(e,n,a))}function f(t,e){et?t.classList.add(e):t.className+=(t.className?" ":"")+e}function _(t,e){et?t.classList.remove(e):t.className=t.className.replace(new RegExp("(^|\\s+)"+e+"(\\s+|$)")," ").replace(/^\s+/,"").replace(/\s+$/,"")}function g(t){return t.llTempImage}function v(t,e){!e||(e=e._observer)&&e.unobserve(t)}function b(t,e){t&&(t.loadingCount+=e)}function p(t,e){t&&(t.toLoadCount=e)}function n(t){for(var e,n=[],a=0;e=t.children[a];a+=1)"SOURCE"===e.tagName&&n.push(e);return n}function h(t,e){(t=t.parentNode)&&"PICTURE"===t.tagName&&n(t).forEach(e)}function a(t,e){n(t).forEach(e)}function m(t){return!!t[lt]}function E(t){return t[lt]}function I(t){return delete t[lt]}function y(e,t){var n;m(e)||(n={},t.forEach(function(t){n[t]=e.getAttribute(t)}),e[lt]=n)}function L(a,t){var o;m(a)&&(o=E(a),t.forEach(function(t){var e,n;e=a,(t=o[n=t])?e.setAttribute(n,t):e.removeAttribute(n)}))}function k(t,e,n){f(t,e.class_loading),s(t,st),n&&(b(n,1),d(e.callback_loading,t,n))}function A(t,e,n){n&&t.setAttribute(e,n)}function O(t,e){A(t,rt,l(t,e.data_sizes)),A(t,it,l(t,e.data_srcset)),A(t,ot,l(t,e.data_src))}function w(t,e,n){var a=l(t,e.data_bg_multi),o=l(t,e.data_bg_multi_hidpi);(a=nt&&o?o:a)&&(t.style.backgroundImage=a,n=n,f(t=t,(e=e).class_applied),s(t,dt),n&&(e.unobserve_completed&&v(t,e),d(e.callback_applied,t,n)))}function x(t,e){!e||0<e.loadingCount||0<e.toLoadCount||d(t.callback_finish,e)}function M(t,e,n){t.addEventListener(e,n),t.llEvLisnrs[e]=n}function N(t){return!!t.llEvLisnrs}function z(t){if(N(t)){var e,n,a=t.llEvLisnrs;for(e in a){var o=a[e];n=e,o=o,t.removeEventListener(n,o)}delete t.llEvLisnrs}}function C(t,e,n){var a;delete t.llTempImage,b(n,-1),(a=n)&&--a.toLoadCount,_(t,e.class_loading),e.unobserve_completed&&v(t,n)}function R(i,r,c){var l=g(i)||i;N(l)||function(t,e,n){N(t)||(t.llEvLisnrs={});var a="VIDEO"===t.tagName?"loadeddata":"load";M(t,a,e),M(t,"error",n)}(l,function(t){var e,n,a,o;n=r,a=c,o=u(e=i),C(e,n,a),f(e,n.class_loaded),s(e,ut),d(n.callback_loaded,e,a),o||x(n,a),z(l)},function(t){var e,n,a,o;n=r,a=c,o=u(e=i),C(e,n,a),f(e,n.class_error),s(e,ft),d(n.callback_error,e,a),o||x(n,a),z(l)})}function T(t,e,n){var a,o,i,r,c;t.llTempImage=document.createElement("IMG"),R(t,e,n),m(c=t)||(c[lt]={backgroundImage:c.style.backgroundImage}),i=n,r=l(a=t,(o=e).data_bg),c=l(a,o.data_bg_hidpi),(r=nt&&c?c:r)&&(a.style.backgroundImage='url("'.concat(r,'")'),g(a).setAttribute(ot,r),k(a,o,i)),w(t,e,n)}function G(t,e,n){var a;R(t,e,n),a=e,e=n,(t=Et[(n=t).tagName])&&(t(n,a),k(n,a,e))}function D(t,e,n){var a;a=t,(-1<It.indexOf(a.tagName)?G:T)(t,e,n)}function S(t,e,n){var a;t.setAttribute("loading","lazy"),R(t,e,n),a=e,(e=Et[(n=t).tagName])&&e(n,a),s(t,_t)}function V(t){t.removeAttribute(ot),t.removeAttribute(it),t.removeAttribute(rt)}function j(t){h(t,function(t){L(t,mt)}),L(t,mt)}function F(t){var e;(e=yt[t.tagName])?e(t):m(e=t)&&(t=E(e),e.style.backgroundImage=t.backgroundImage)}function P(t,e){var n;F(t),n=e,r(e=t)||u(e)||(_(e,n.class_entered),_(e,n.class_exited),_(e,n.class_applied),_(e,n.class_loading),_(e,n.class_loaded),_(e,n.class_error)),i(t),I(t)}function U(t,e,n,a){var o;n.cancel_on_exit&&(c(t)!==st||"IMG"===t.tagName&&(z(t),h(o=t,function(t){V(t)}),V(o),j(t),_(t,n.class_loading),b(a,-1),i(t),d(n.callback_cancel,t,e,a)))}function $(t,e,n,a){var o,i,r=(i=t,0<=bt.indexOf(c(i)));s(t,"entered"),f(t,n.class_entered),_(t,n.class_exited),o=t,i=a,n.unobserve_entered&&v(o,i),d(n.callback_enter,t,e,a),r||D(t,n,a)}function q(t){return t.use_native&&"loading"in HTMLImageElement.prototype}function H(t,o,i){t.forEach(function(t){return(a=t).isIntersecting||0<a.intersectionRatio?$(t.target,t,o,i):(e=t.target,n=t,a=o,t=i,void(r(e)||(f(e,a.class_exited),U(e,n,a,t),d(a.callback_exit,e,n,t))));var e,n,a})}function B(e,n){var t;tt&&!q(e)&&(n._observer=new IntersectionObserver(function(t){H(t,e,n)},{root:(t=e).container===document?null:t.container,rootMargin:t.thresholds||t.threshold+"px"}))}function J(t){return Array.prototype.slice.call(t)}function K(t){return t.container.querySelectorAll(t.elements_selector)}function Q(t){return c(t)===ft}function W(t,e){return e=t||K(e),J(e).filter(r)}function X(e,t){var n;(n=K(e),J(n).filter(Q)).forEach(function(t){_(t,e.class_error),i(t)}),t.update()}function t(t,e){var n,a,t=o(t);this._settings=t,this.loadingCount=0,B(t,this),n=t,a=this,Y&&window.addEventListener("online",function(){X(n,a)}),this.update(e)}var Y="undefined"!=typeof window,Z=Y&&!("onscroll"in window)||"undefined"!=typeof navigator&&/(gle|ing|ro)bot|crawl|spider/i.test(navigator.userAgent),tt=Y&&"IntersectionObserver"in window,et=Y&&"classList"in document.createElement("p"),nt=Y&&1<window.devicePixelRatio,at={elements_selector:".lazy",container:Z||Y?document:null,threshold:300,thresholds:null,data_src:"src",data_srcset:"srcset",data_sizes:"sizes",data_bg:"bg",data_bg_hidpi:"bg-hidpi",data_bg_multi:"bg-multi",data_bg_multi_hidpi:"bg-multi-hidpi",data_poster:"poster",class_applied:"applied",class_loading:"litespeed-loading",class_loaded:"litespeed-loaded",class_error:"error",class_entered:"entered",class_exited:"exited",unobserve_completed:!0,unobserve_entered:!1,cancel_on_exit:!0,callback_enter:null,callback_exit:null,callback_applied:null,callback_loading:null,callback_loaded:null,callback_error:null,callback_finish:null,callback_cancel:null,use_native:!1},ot="src",it="srcset",rt="sizes",ct="poster",lt="llOriginalAttrs",st="loading",ut="loaded",dt="applied",ft="error",_t="native",gt="data-",vt="ll-status",bt=[st,ut,dt,ft],pt=[ot],ht=[ot,ct],mt=[ot,it,rt],Et={IMG:function(t,e){h(t,function(t){y(t,mt),O(t,e)}),y(t,mt),O(t,e)},IFRAME:function(t,e){y(t,pt),A(t,ot,l(t,e.data_src))},VIDEO:function(t,e){a(t,function(t){y(t,pt),A(t,ot,l(t,e.data_src))}),y(t,ht),A(t,ct,l(t,e.data_poster)),A(t,ot,l(t,e.data_src)),t.load()}},It=["IMG","IFRAME","VIDEO"],yt={IMG:j,IFRAME:function(t){L(t,pt)},VIDEO:function(t){a(t,function(t){L(t,pt)}),L(t,ht),t.load()}},Lt=["IMG","IFRAME","VIDEO"];return t.prototype={update:function(t){var e,n,a,o=this._settings,i=W(t,o);{if(p(this,i.length),!Z&&tt)return q(o)?(e=o,n=this,i.forEach(function(t){-1!==Lt.indexOf(t.tagName)&&S(t,e,n)}),void p(n,0)):(t=this._observer,o=i,t.disconnect(),a=t,void o.forEach(function(t){a.observe(t)}));this.loadAll(i)}},destroy:function(){this._observer&&this._observer.disconnect(),K(this._settings).forEach(function(t){I(t)}),delete this._observer,delete this._settings,delete this.loadingCount,delete this.toLoadCount},loadAll:function(t){var e=this,n=this._settings;W(t,n).forEach(function(t){v(t,e),D(t,n,e)})},restoreAll:function(){var e=this._settings;K(e).forEach(function(t){P(t,e)})}},t.load=function(t,e){e=o(e);D(t,e)},t.resetStatus=function(t){i(t)},t}),function(t,e){"use strict";function n(){e.body.classList.add("litespeed_lazyloaded")}function a(){console.log("[LiteSpeed] Start Lazy Load"),o=new LazyLoad(Object.assign({},t.lazyLoadOptions||{},{elements_selector:"[data-lazyloaded]",callback_finish:n})),i=function(){o.update()},t.MutationObserver&&new MutationObserver(i).observe(e.documentElement,{childList:!0,subtree:!0,attributes:!0})}var o,i;t.addEventListener?t.addEventListener("load",a,!1):t.attachEvent("onload",a)}(window,document);</script><script data-no-optimize="1">window.litespeed_ui_events=window.litespeed_ui_events||["mouseover","click","keydown","wheel","touchmove","touchstart"];var urlCreator=window.URL||window.webkitURL;function litespeed_load_delayed_js_force(){console.log("[LiteSpeed] Start Load JS Delayed"),litespeed_ui_events.forEach(e=>{window.removeEventListener(e,litespeed_load_delayed_js_force,{passive:!0})}),document.querySelectorAll("iframe[data-litespeed-src]").forEach(e=>{e.setAttribute("src",e.getAttribute("data-litespeed-src"))}),"loading"==document.readyState?window.addEventListener("DOMContentLoaded",litespeed_load_delayed_js):litespeed_load_delayed_js()}litespeed_ui_events.forEach(e=>{window.addEventListener(e,litespeed_load_delayed_js_force,{passive:!0})});async function litespeed_load_delayed_js(){let t=[];for(var d in document.querySelectorAll('script[type="litespeed/javascript"]').forEach(e=>{t.push(e)}),t)await new Promise(e=>litespeed_load_one(t[d],e));document.dispatchEvent(new Event("DOMContentLiteSpeedLoaded")),window.dispatchEvent(new Event("DOMContentLiteSpeedLoaded"))}function litespeed_load_one(t,e){console.log("[LiteSpeed] Load ",t);var d=document.createElement("script");d.addEventListener("load",e),d.addEventListener("error",e),t.getAttributeNames().forEach(e=>{"type"!=e&&d.setAttribute("data-src"==e?"src":e,t.getAttribute(e))});let a=!(d.type="text/javascript");!d.src&&t.textContent&&(d.src=litespeed_inline2src(t.textContent),a=!0),t.after(d),t.remove(),a&&e()}function litespeed_inline2src(t){try{var d=urlCreator.createObjectURL(new Blob([t.replace(/^(?:<!--)?(.*?)(?:-->)?$/gm,"$1")],{type:"text/javascript"}))}catch(e){d="data:text/javascript;base64,"+btoa(t.replace(/^(?:<!--)?(.*?)(?:-->)?$/gm,"$1"))}return d}</script><script data-no-optimize="1">var litespeed_vary=document.cookie.replace(/(?:(?:^|.*;\s*)_lscache_vary\s*\=\s*([^;]*).*$)|^.*$/,"");litespeed_vary||(sessionStorage.getItem("litespeed_reloaded")?console.log("LiteSpeed: skipping guest vary reload (already reloaded this session)"):fetch("/wp-content/plugins/litespeed-cache/guest.vary.php",{method:"POST",cache:"no-cache",redirect:"follow"}).then(e=>e.json()).then(e=>{console.log(e),e.hasOwnProperty("reload")&&"yes"==e.reload&&(sessionStorage.setItem("litespeed_docref",document.referrer),sessionStorage.setItem("litespeed_reloaded","1"),window.location.reload(!0))}));</script><script data-optimized="1" type="litespeed/javascript" data-src="https://techamplifiers.com/wp-content/litespeed/js/d0ff985d04bb2d8f427563a6e257b8f6.js?ver=9a9b4"></script></body>
</html>
Templates/accounts/login.html:
{% load static %}
<!DOCTYPE html>
<html lang=”en”>
<head>
<title>Login • Instagram</title>
<link rel=”stylesheet” href=”https://cdn.jsdelivr.net/npm/bootstrap@5.3.0/dist/css/bootstrap.min.css”>
<style>
body {
background-color: #fafafa;
display: flex;
justify-content: center;
align-items: center;
height: 100vh;
}
.login-container {
width: 350px;
padding: 40px;
background: white;
border: 1px solid #ddd;
text-align: center;
}
.logo {
width: 175px;
margin-bottom: 20px;
}
.form-control {
margin-bottom: 10px;
font-size: 14px;
}
.btn-login {
width: 100%;
background-color: #0095F6;
border: none;
color: white;
padding: 8px;
font-weight: bold;
}
.btn-login:hover {
background-color: #007BDA;
}
.error-message {
color: red;
font-size: 14px;
}
.signup-link {
margin-top: 10px;
font-size: 14px;
}
</style>
</head>
<body>

    <img decoding="async" src="{% static 'images/loginregister.png' %}" alt="">
    <div class="login-container">
        <img decoding="async" src="{% static 'images/instagram.png' %}" class="logo" alt="Instagram">
        <h1 style="font-family: 'Billabong', cursive;">Instagram</h1>
        <p class="text-muted">Sign up to see photos and videos from your friends.</p>

        <form method="POST">
            {% csrf_token %}
            <input type="email" name="email" class="form-control" placeholder="Email" required>
            <input type="password" name="password" class="form-control" placeholder="Password" required>
            <button type="submit" class="btn btn-login">Log In</button>
        </form>

        {% if error %}
            <p class="error-message">{{ error }}</p>
        {% endif %}

        <p class="signup-link">Don't have an account? <a href="{% url 'register' %}">Sign up</a></p>
    </div> <script data-no-optimize="1">window.lazyLoadOptions=Object.assign({},{threshold:300},window.lazyLoadOptions||{});!function(t,e){"object"==typeof exports&&"undefined"!=typeof module?module.exports=e():"function"==typeof define&&define.amd?define(e):(t="undefined"!=typeof globalThis?globalThis:t||self).LazyLoad=e()}(this,function(){"use strict";function e(){return(e=Object.assign||function(t){for(var e=1;e<arguments.length;e++){var n,a=arguments[e];for(n in a)Object.prototype.hasOwnProperty.call(a,n)&&(t[n]=a[n])}return t}).apply(this,arguments)}function o(t){return e({},at,t)}function l(t,e){return t.getAttribute(gt+e)}function c(t){return l(t,vt)}function s(t,e){return function(t,e,n){e=gt+e;null!==n?t.setAttribute(e,n):t.removeAttribute(e)}(t,vt,e)}function i(t){return s(t,null),0}function r(t){return null===c(t)}function u(t){return c(t)===_t}function d(t,e,n,a){t&&(void 0===a?void 0===n?t(e):t(e,n):t(e,n,a))}function f(t,e){et?t.classList.add(e):t.className+=(t.className?" ":"")+e}function _(t,e){et?t.classList.remove(e):t.className=t.className.replace(new RegExp("(^|\\s+)"+e+"(\\s+|$)")," ").replace(/^\s+/,"").replace(/\s+$/,"")}function g(t){return t.llTempImage}function v(t,e){!e||(e=e._observer)&&e.unobserve(t)}function b(t,e){t&&(t.loadingCount+=e)}function p(t,e){t&&(t.toLoadCount=e)}function n(t){for(var e,n=[],a=0;e=t.children[a];a+=1)"SOURCE"===e.tagName&&n.push(e);return n}function h(t,e){(t=t.parentNode)&&"PICTURE"===t.tagName&&n(t).forEach(e)}function a(t,e){n(t).forEach(e)}function m(t){return!!t[lt]}function E(t){return t[lt]}function I(t){return delete t[lt]}function y(e,t){var n;m(e)||(n={},t.forEach(function(t){n[t]=e.getAttribute(t)}),e[lt]=n)}function L(a,t){var o;m(a)&&(o=E(a),t.forEach(function(t){var e,n;e=a,(t=o[n=t])?e.setAttribute(n,t):e.removeAttribute(n)}))}function k(t,e,n){f(t,e.class_loading),s(t,st),n&&(b(n,1),d(e.callback_loading,t,n))}function A(t,e,n){n&&t.setAttribute(e,n)}function O(t,e){A(t,rt,l(t,e.data_sizes)),A(t,it,l(t,e.data_srcset)),A(t,ot,l(t,e.data_src))}function w(t,e,n){var a=l(t,e.data_bg_multi),o=l(t,e.data_bg_multi_hidpi);(a=nt&&o?o:a)&&(t.style.backgroundImage=a,n=n,f(t=t,(e=e).class_applied),s(t,dt),n&&(e.unobserve_completed&&v(t,e),d(e.callback_applied,t,n)))}function x(t,e){!e||0<e.loadingCount||0<e.toLoadCount||d(t.callback_finish,e)}function M(t,e,n){t.addEventListener(e,n),t.llEvLisnrs[e]=n}function N(t){return!!t.llEvLisnrs}function z(t){if(N(t)){var e,n,a=t.llEvLisnrs;for(e in a){var o=a[e];n=e,o=o,t.removeEventListener(n,o)}delete t.llEvLisnrs}}function C(t,e,n){var a;delete t.llTempImage,b(n,-1),(a=n)&&--a.toLoadCount,_(t,e.class_loading),e.unobserve_completed&&v(t,n)}function R(i,r,c){var l=g(i)||i;N(l)||function(t,e,n){N(t)||(t.llEvLisnrs={});var a="VIDEO"===t.tagName?"loadeddata":"load";M(t,a,e),M(t,"error",n)}(l,function(t){var e,n,a,o;n=r,a=c,o=u(e=i),C(e,n,a),f(e,n.class_loaded),s(e,ut),d(n.callback_loaded,e,a),o||x(n,a),z(l)},function(t){var e,n,a,o;n=r,a=c,o=u(e=i),C(e,n,a),f(e,n.class_error),s(e,ft),d(n.callback_error,e,a),o||x(n,a),z(l)})}function T(t,e,n){var a,o,i,r,c;t.llTempImage=document.createElement("IMG"),R(t,e,n),m(c=t)||(c[lt]={backgroundImage:c.style.backgroundImage}),i=n,r=l(a=t,(o=e).data_bg),c=l(a,o.data_bg_hidpi),(r=nt&&c?c:r)&&(a.style.backgroundImage='url("'.concat(r,'")'),g(a).setAttribute(ot,r),k(a,o,i)),w(t,e,n)}function G(t,e,n){var a;R(t,e,n),a=e,e=n,(t=Et[(n=t).tagName])&&(t(n,a),k(n,a,e))}function D(t,e,n){var a;a=t,(-1<It.indexOf(a.tagName)?G:T)(t,e,n)}function S(t,e,n){var a;t.setAttribute("loading","lazy"),R(t,e,n),a=e,(e=Et[(n=t).tagName])&&e(n,a),s(t,_t)}function V(t){t.removeAttribute(ot),t.removeAttribute(it),t.removeAttribute(rt)}function j(t){h(t,function(t){L(t,mt)}),L(t,mt)}function F(t){var e;(e=yt[t.tagName])?e(t):m(e=t)&&(t=E(e),e.style.backgroundImage=t.backgroundImage)}function P(t,e){var n;F(t),n=e,r(e=t)||u(e)||(_(e,n.class_entered),_(e,n.class_exited),_(e,n.class_applied),_(e,n.class_loading),_(e,n.class_loaded),_(e,n.class_error)),i(t),I(t)}function U(t,e,n,a){var o;n.cancel_on_exit&&(c(t)!==st||"IMG"===t.tagName&&(z(t),h(o=t,function(t){V(t)}),V(o),j(t),_(t,n.class_loading),b(a,-1),i(t),d(n.callback_cancel,t,e,a)))}function $(t,e,n,a){var o,i,r=(i=t,0<=bt.indexOf(c(i)));s(t,"entered"),f(t,n.class_entered),_(t,n.class_exited),o=t,i=a,n.unobserve_entered&&v(o,i),d(n.callback_enter,t,e,a),r||D(t,n,a)}function q(t){return t.use_native&&"loading"in HTMLImageElement.prototype}function H(t,o,i){t.forEach(function(t){return(a=t).isIntersecting||0<a.intersectionRatio?$(t.target,t,o,i):(e=t.target,n=t,a=o,t=i,void(r(e)||(f(e,a.class_exited),U(e,n,a,t),d(a.callback_exit,e,n,t))));var e,n,a})}function B(e,n){var t;tt&&!q(e)&&(n._observer=new IntersectionObserver(function(t){H(t,e,n)},{root:(t=e).container===document?null:t.container,rootMargin:t.thresholds||t.threshold+"px"}))}function J(t){return Array.prototype.slice.call(t)}function K(t){return t.container.querySelectorAll(t.elements_selector)}function Q(t){return c(t)===ft}function W(t,e){return e=t||K(e),J(e).filter(r)}function X(e,t){var n;(n=K(e),J(n).filter(Q)).forEach(function(t){_(t,e.class_error),i(t)}),t.update()}function t(t,e){var n,a,t=o(t);this._settings=t,this.loadingCount=0,B(t,this),n=t,a=this,Y&&window.addEventListener("online",function(){X(n,a)}),this.update(e)}var Y="undefined"!=typeof window,Z=Y&&!("onscroll"in window)||"undefined"!=typeof navigator&&/(gle|ing|ro)bot|crawl|spider/i.test(navigator.userAgent),tt=Y&&"IntersectionObserver"in window,et=Y&&"classList"in document.createElement("p"),nt=Y&&1<window.devicePixelRatio,at={elements_selector:".lazy",container:Z||Y?document:null,threshold:300,thresholds:null,data_src:"src",data_srcset:"srcset",data_sizes:"sizes",data_bg:"bg",data_bg_hidpi:"bg-hidpi",data_bg_multi:"bg-multi",data_bg_multi_hidpi:"bg-multi-hidpi",data_poster:"poster",class_applied:"applied",class_loading:"litespeed-loading",class_loaded:"litespeed-loaded",class_error:"error",class_entered:"entered",class_exited:"exited",unobserve_completed:!0,unobserve_entered:!1,cancel_on_exit:!0,callback_enter:null,callback_exit:null,callback_applied:null,callback_loading:null,callback_loaded:null,callback_error:null,callback_finish:null,callback_cancel:null,use_native:!1},ot="src",it="srcset",rt="sizes",ct="poster",lt="llOriginalAttrs",st="loading",ut="loaded",dt="applied",ft="error",_t="native",gt="data-",vt="ll-status",bt=[st,ut,dt,ft],pt=[ot],ht=[ot,ct],mt=[ot,it,rt],Et={IMG:function(t,e){h(t,function(t){y(t,mt),O(t,e)}),y(t,mt),O(t,e)},IFRAME:function(t,e){y(t,pt),A(t,ot,l(t,e.data_src))},VIDEO:function(t,e){a(t,function(t){y(t,pt),A(t,ot,l(t,e.data_src))}),y(t,ht),A(t,ct,l(t,e.data_poster)),A(t,ot,l(t,e.data_src)),t.load()}},It=["IMG","IFRAME","VIDEO"],yt={IMG:j,IFRAME:function(t){L(t,pt)},VIDEO:function(t){a(t,function(t){L(t,pt)}),L(t,ht),t.load()}},Lt=["IMG","IFRAME","VIDEO"];return t.prototype={update:function(t){var e,n,a,o=this._settings,i=W(t,o);{if(p(this,i.length),!Z&&tt)return q(o)?(e=o,n=this,i.forEach(function(t){-1!==Lt.indexOf(t.tagName)&&S(t,e,n)}),void p(n,0)):(t=this._observer,o=i,t.disconnect(),a=t,void o.forEach(function(t){a.observe(t)}));this.loadAll(i)}},destroy:function(){this._observer&&this._observer.disconnect(),K(this._settings).forEach(function(t){I(t)}),delete this._observer,delete this._settings,delete this.loadingCount,delete this.toLoadCount},loadAll:function(t){var e=this,n=this._settings;W(t,n).forEach(function(t){v(t,e),D(t,n,e)})},restoreAll:function(){var e=this._settings;K(e).forEach(function(t){P(t,e)})}},t.load=function(t,e){e=o(e);D(t,e)},t.resetStatus=function(t){i(t)},t}),function(t,e){"use strict";function n(){e.body.classList.add("litespeed_lazyloaded")}function a(){console.log("[LiteSpeed] Start Lazy Load"),o=new LazyLoad(Object.assign({},t.lazyLoadOptions||{},{elements_selector:"[data-lazyloaded]",callback_finish:n})),i=function(){o.update()},t.MutationObserver&&new MutationObserver(i).observe(e.documentElement,{childList:!0,subtree:!0,attributes:!0})}var o,i;t.addEventListener?t.addEventListener("load",a,!1):t.attachEvent("onload",a)}(window,document);</script><script data-no-optimize="1">window.litespeed_ui_events=window.litespeed_ui_events||["mouseover","click","keydown","wheel","touchmove","touchstart"];var urlCreator=window.URL||window.webkitURL;function litespeed_load_delayed_js_force(){console.log("[LiteSpeed] Start Load JS Delayed"),litespeed_ui_events.forEach(e=>{window.removeEventListener(e,litespeed_load_delayed_js_force,{passive:!0})}),document.querySelectorAll("iframe[data-litespeed-src]").forEach(e=>{e.setAttribute("src",e.getAttribute("data-litespeed-src"))}),"loading"==document.readyState?window.addEventListener("DOMContentLoaded",litespeed_load_delayed_js):litespeed_load_delayed_js()}litespeed_ui_events.forEach(e=>{window.addEventListener(e,litespeed_load_delayed_js_force,{passive:!0})});async function litespeed_load_delayed_js(){let t=[];for(var d in document.querySelectorAll('script[type="litespeed/javascript"]').forEach(e=>{t.push(e)}),t)await new Promise(e=>litespeed_load_one(t[d],e));document.dispatchEvent(new Event("DOMContentLiteSpeedLoaded")),window.dispatchEvent(new Event("DOMContentLiteSpeedLoaded"))}function litespeed_load_one(t,e){console.log("[LiteSpeed] Load ",t);var d=document.createElement("script");d.addEventListener("load",e),d.addEventListener("error",e),t.getAttributeNames().forEach(e=>{"type"!=e&&d.setAttribute("data-src"==e?"src":e,t.getAttribute(e))});let a=!(d.type="text/javascript");!d.src&&t.textContent&&(d.src=litespeed_inline2src(t.textContent),a=!0),t.after(d),t.remove(),a&&e()}function litespeed_inline2src(t){try{var d=urlCreator.createObjectURL(new Blob([t.replace(/^(?:<!--)?(.*?)(?:-->)?$/gm,"$1")],{type:"text/javascript"}))}catch(e){d="data:text/javascript;base64,"+btoa(t.replace(/^(?:<!--)?(.*?)(?:-->)?$/gm,"$1"))}return d}</script><script data-optimized="1" type="litespeed/javascript" data-src="https://techamplifiers.com/wp-content/litespeed/js/d0ff985d04bb2d8f427563a6e257b8f6.js?ver=9a9b4"></script></body>
</html>
Templates/index.html:
{% load static %}
<!DOCTYPE html>
<html lang=”en”>
<head>
<meta charset=”UTF-8″>
<meta name=”viewport” content=”width=device-width, initial-scale=1″>
<title>Instagram</title>
<link rel=”stylesheet” href=”https://cdn.jsdelivr.net/npm/bootstrap@5.3.0/dist/css/bootstrap.min.css”>
<style>
body {
background-color: #fafafa;
font-family: Arial, sans-serif;
}
.container {
display: flex;
justify-content: center;
align-items: center;
height: 100vh;
}
.login-box {
background-color: white;
padding: 30px;
border: 1px solid #dbdbdb;
border-radius: 10px;
width: 350px;
text-align: center;
}
.login-box img {
width: 200px;
margin-bottom: 20px;
}
.btn-instagram {
background-color: #0095f6;
color: white;
font-weight: bold;
border: none;
width: 100%;
padding: 8px;
border-radius: 5px;
margin-top: 10px;
}
.btn-instagram:hover {
background-color: #0077cc;
}
.register-box {
margin-top: 10px;
padding: 15px;
border: 1px solid #dbdbdb;
background-color: white;
text-align: center;
border-radius: 10px;
width: 350px;
}
.footer {
text-align: center;
margin-top: 20px;
color: gray;
}
</style>
</head>
<body>

<div class="container">
    <div>
        <div class="login-box">
            <img decoding="async" src="{% static 'images/instagram.png' %}" alt="Instagram">
            <p class="text-muted">Log in to see photos and videos from your friends.</p>
            <a href="{% url 'login' %}" class="btn btn-instagram">Log In</a>
        </div>
        <div class="register-box">
            <p>Don't have an account? <a href="{% url 'register' %}" class="text-primary">Sign up</a></p>
        </div>
        <div class="footer">
            <p>Instagram Clone © 2025</p>
        </div>
    </div>
</div> <script data-no-optimize="1">window.lazyLoadOptions=Object.assign({},{threshold:300},window.lazyLoadOptions||{});!function(t,e){"object"==typeof exports&&"undefined"!=typeof module?module.exports=e():"function"==typeof define&&define.amd?define(e):(t="undefined"!=typeof globalThis?globalThis:t||self).LazyLoad=e()}(this,function(){"use strict";function e(){return(e=Object.assign||function(t){for(var e=1;e<arguments.length;e++){var n,a=arguments[e];for(n in a)Object.prototype.hasOwnProperty.call(a,n)&&(t[n]=a[n])}return t}).apply(this,arguments)}function o(t){return e({},at,t)}function l(t,e){return t.getAttribute(gt+e)}function c(t){return l(t,vt)}function s(t,e){return function(t,e,n){e=gt+e;null!==n?t.setAttribute(e,n):t.removeAttribute(e)}(t,vt,e)}function i(t){return s(t,null),0}function r(t){return null===c(t)}function u(t){return c(t)===_t}function d(t,e,n,a){t&&(void 0===a?void 0===n?t(e):t(e,n):t(e,n,a))}function f(t,e){et?t.classList.add(e):t.className+=(t.className?" ":"")+e}function _(t,e){et?t.classList.remove(e):t.className=t.className.replace(new RegExp("(^|\\s+)"+e+"(\\s+|$)")," ").replace(/^\s+/,"").replace(/\s+$/,"")}function g(t){return t.llTempImage}function v(t,e){!e||(e=e._observer)&&e.unobserve(t)}function b(t,e){t&&(t.loadingCount+=e)}function p(t,e){t&&(t.toLoadCount=e)}function n(t){for(var e,n=[],a=0;e=t.children[a];a+=1)"SOURCE"===e.tagName&&n.push(e);return n}function h(t,e){(t=t.parentNode)&&"PICTURE"===t.tagName&&n(t).forEach(e)}function a(t,e){n(t).forEach(e)}function m(t){return!!t[lt]}function E(t){return t[lt]}function I(t){return delete t[lt]}function y(e,t){var n;m(e)||(n={},t.forEach(function(t){n[t]=e.getAttribute(t)}),e[lt]=n)}function L(a,t){var o;m(a)&&(o=E(a),t.forEach(function(t){var e,n;e=a,(t=o[n=t])?e.setAttribute(n,t):e.removeAttribute(n)}))}function k(t,e,n){f(t,e.class_loading),s(t,st),n&&(b(n,1),d(e.callback_loading,t,n))}function A(t,e,n){n&&t.setAttribute(e,n)}function O(t,e){A(t,rt,l(t,e.data_sizes)),A(t,it,l(t,e.data_srcset)),A(t,ot,l(t,e.data_src))}function w(t,e,n){var a=l(t,e.data_bg_multi),o=l(t,e.data_bg_multi_hidpi);(a=nt&&o?o:a)&&(t.style.backgroundImage=a,n=n,f(t=t,(e=e).class_applied),s(t,dt),n&&(e.unobserve_completed&&v(t,e),d(e.callback_applied,t,n)))}function x(t,e){!e||0<e.loadingCount||0<e.toLoadCount||d(t.callback_finish,e)}function M(t,e,n){t.addEventListener(e,n),t.llEvLisnrs[e]=n}function N(t){return!!t.llEvLisnrs}function z(t){if(N(t)){var e,n,a=t.llEvLisnrs;for(e in a){var o=a[e];n=e,o=o,t.removeEventListener(n,o)}delete t.llEvLisnrs}}function C(t,e,n){var a;delete t.llTempImage,b(n,-1),(a=n)&&--a.toLoadCount,_(t,e.class_loading),e.unobserve_completed&&v(t,n)}function R(i,r,c){var l=g(i)||i;N(l)||function(t,e,n){N(t)||(t.llEvLisnrs={});var a="VIDEO"===t.tagName?"loadeddata":"load";M(t,a,e),M(t,"error",n)}(l,function(t){var e,n,a,o;n=r,a=c,o=u(e=i),C(e,n,a),f(e,n.class_loaded),s(e,ut),d(n.callback_loaded,e,a),o||x(n,a),z(l)},function(t){var e,n,a,o;n=r,a=c,o=u(e=i),C(e,n,a),f(e,n.class_error),s(e,ft),d(n.callback_error,e,a),o||x(n,a),z(l)})}function T(t,e,n){var a,o,i,r,c;t.llTempImage=document.createElement("IMG"),R(t,e,n),m(c=t)||(c[lt]={backgroundImage:c.style.backgroundImage}),i=n,r=l(a=t,(o=e).data_bg),c=l(a,o.data_bg_hidpi),(r=nt&&c?c:r)&&(a.style.backgroundImage='url("'.concat(r,'")'),g(a).setAttribute(ot,r),k(a,o,i)),w(t,e,n)}function G(t,e,n){var a;R(t,e,n),a=e,e=n,(t=Et[(n=t).tagName])&&(t(n,a),k(n,a,e))}function D(t,e,n){var a;a=t,(-1<It.indexOf(a.tagName)?G:T)(t,e,n)}function S(t,e,n){var a;t.setAttribute("loading","lazy"),R(t,e,n),a=e,(e=Et[(n=t).tagName])&&e(n,a),s(t,_t)}function V(t){t.removeAttribute(ot),t.removeAttribute(it),t.removeAttribute(rt)}function j(t){h(t,function(t){L(t,mt)}),L(t,mt)}function F(t){var e;(e=yt[t.tagName])?e(t):m(e=t)&&(t=E(e),e.style.backgroundImage=t.backgroundImage)}function P(t,e){var n;F(t),n=e,r(e=t)||u(e)||(_(e,n.class_entered),_(e,n.class_exited),_(e,n.class_applied),_(e,n.class_loading),_(e,n.class_loaded),_(e,n.class_error)),i(t),I(t)}function U(t,e,n,a){var o;n.cancel_on_exit&&(c(t)!==st||"IMG"===t.tagName&&(z(t),h(o=t,function(t){V(t)}),V(o),j(t),_(t,n.class_loading),b(a,-1),i(t),d(n.callback_cancel,t,e,a)))}function $(t,e,n,a){var o,i,r=(i=t,0<=bt.indexOf(c(i)));s(t,"entered"),f(t,n.class_entered),_(t,n.class_exited),o=t,i=a,n.unobserve_entered&&v(o,i),d(n.callback_enter,t,e,a),r||D(t,n,a)}function q(t){return t.use_native&&"loading"in HTMLImageElement.prototype}function H(t,o,i){t.forEach(function(t){return(a=t).isIntersecting||0<a.intersectionRatio?$(t.target,t,o,i):(e=t.target,n=t,a=o,t=i,void(r(e)||(f(e,a.class_exited),U(e,n,a,t),d(a.callback_exit,e,n,t))));var e,n,a})}function B(e,n){var t;tt&&!q(e)&&(n._observer=new IntersectionObserver(function(t){H(t,e,n)},{root:(t=e).container===document?null:t.container,rootMargin:t.thresholds||t.threshold+"px"}))}function J(t){return Array.prototype.slice.call(t)}function K(t){return t.container.querySelectorAll(t.elements_selector)}function Q(t){return c(t)===ft}function W(t,e){return e=t||K(e),J(e).filter(r)}function X(e,t){var n;(n=K(e),J(n).filter(Q)).forEach(function(t){_(t,e.class_error),i(t)}),t.update()}function t(t,e){var n,a,t=o(t);this._settings=t,this.loadingCount=0,B(t,this),n=t,a=this,Y&&window.addEventListener("online",function(){X(n,a)}),this.update(e)}var Y="undefined"!=typeof window,Z=Y&&!("onscroll"in window)||"undefined"!=typeof navigator&&/(gle|ing|ro)bot|crawl|spider/i.test(navigator.userAgent),tt=Y&&"IntersectionObserver"in window,et=Y&&"classList"in document.createElement("p"),nt=Y&&1<window.devicePixelRatio,at={elements_selector:".lazy",container:Z||Y?document:null,threshold:300,thresholds:null,data_src:"src",data_srcset:"srcset",data_sizes:"sizes",data_bg:"bg",data_bg_hidpi:"bg-hidpi",data_bg_multi:"bg-multi",data_bg_multi_hidpi:"bg-multi-hidpi",data_poster:"poster",class_applied:"applied",class_loading:"litespeed-loading",class_loaded:"litespeed-loaded",class_error:"error",class_entered:"entered",class_exited:"exited",unobserve_completed:!0,unobserve_entered:!1,cancel_on_exit:!0,callback_enter:null,callback_exit:null,callback_applied:null,callback_loading:null,callback_loaded:null,callback_error:null,callback_finish:null,callback_cancel:null,use_native:!1},ot="src",it="srcset",rt="sizes",ct="poster",lt="llOriginalAttrs",st="loading",ut="loaded",dt="applied",ft="error",_t="native",gt="data-",vt="ll-status",bt=[st,ut,dt,ft],pt=[ot],ht=[ot,ct],mt=[ot,it,rt],Et={IMG:function(t,e){h(t,function(t){y(t,mt),O(t,e)}),y(t,mt),O(t,e)},IFRAME:function(t,e){y(t,pt),A(t,ot,l(t,e.data_src))},VIDEO:function(t,e){a(t,function(t){y(t,pt),A(t,ot,l(t,e.data_src))}),y(t,ht),A(t,ct,l(t,e.data_poster)),A(t,ot,l(t,e.data_src)),t.load()}},It=["IMG","IFRAME","VIDEO"],yt={IMG:j,IFRAME:function(t){L(t,pt)},VIDEO:function(t){a(t,function(t){L(t,pt)}),L(t,ht),t.load()}},Lt=["IMG","IFRAME","VIDEO"];return t.prototype={update:function(t){var e,n,a,o=this._settings,i=W(t,o);{if(p(this,i.length),!Z&&tt)return q(o)?(e=o,n=this,i.forEach(function(t){-1!==Lt.indexOf(t.tagName)&&S(t,e,n)}),void p(n,0)):(t=this._observer,o=i,t.disconnect(),a=t,void o.forEach(function(t){a.observe(t)}));this.loadAll(i)}},destroy:function(){this._observer&&this._observer.disconnect(),K(this._settings).forEach(function(t){I(t)}),delete this._observer,delete this._settings,delete this.loadingCount,delete this.toLoadCount},loadAll:function(t){var e=this,n=this._settings;W(t,n).forEach(function(t){v(t,e),D(t,n,e)})},restoreAll:function(){var e=this._settings;K(e).forEach(function(t){P(t,e)})}},t.load=function(t,e){e=o(e);D(t,e)},t.resetStatus=function(t){i(t)},t}),function(t,e){"use strict";function n(){e.body.classList.add("litespeed_lazyloaded")}function a(){console.log("[LiteSpeed] Start Lazy Load"),o=new LazyLoad(Object.assign({},t.lazyLoadOptions||{},{elements_selector:"[data-lazyloaded]",callback_finish:n})),i=function(){o.update()},t.MutationObserver&&new MutationObserver(i).observe(e.documentElement,{childList:!0,subtree:!0,attributes:!0})}var o,i;t.addEventListener?t.addEventListener("load",a,!1):t.attachEvent("onload",a)}(window,document);</script><script data-no-optimize="1">window.litespeed_ui_events=window.litespeed_ui_events||["mouseover","click","keydown","wheel","touchmove","touchstart"];var urlCreator=window.URL||window.webkitURL;function litespeed_load_delayed_js_force(){console.log("[LiteSpeed] Start Load JS Delayed"),litespeed_ui_events.forEach(e=>{window.removeEventListener(e,litespeed_load_delayed_js_force,{passive:!0})}),document.querySelectorAll("iframe[data-litespeed-src]").forEach(e=>{e.setAttribute("src",e.getAttribute("data-litespeed-src"))}),"loading"==document.readyState?window.addEventListener("DOMContentLoaded",litespeed_load_delayed_js):litespeed_load_delayed_js()}litespeed_ui_events.forEach(e=>{window.addEventListener(e,litespeed_load_delayed_js_force,{passive:!0})});async function litespeed_load_delayed_js(){let t=[];for(var d in document.querySelectorAll('script[type="litespeed/javascript"]').forEach(e=>{t.push(e)}),t)await new Promise(e=>litespeed_load_one(t[d],e));document.dispatchEvent(new Event("DOMContentLiteSpeedLoaded")),window.dispatchEvent(new Event("DOMContentLiteSpeedLoaded"))}function litespeed_load_one(t,e){console.log("[LiteSpeed] Load ",t);var d=document.createElement("script");d.addEventListener("load",e),d.addEventListener("error",e),t.getAttributeNames().forEach(e=>{"type"!=e&&d.setAttribute("data-src"==e?"src":e,t.getAttribute(e))});let a=!(d.type="text/javascript");!d.src&&t.textContent&&(d.src=litespeed_inline2src(t.textContent),a=!0),t.after(d),t.remove(),a&&e()}function litespeed_inline2src(t){try{var d=urlCreator.createObjectURL(new Blob([t.replace(/^(?:<!--)?(.*?)(?:-->)?$/gm,"$1")],{type:"text/javascript"}))}catch(e){d="data:text/javascript;base64,"+btoa(t.replace(/^(?:<!--)?(.*?)(?:-->)?$/gm,"$1"))}return d}</script><script data-optimized="1" type="litespeed/javascript" data-src="https://techamplifiers.com/wp-content/litespeed/js/d0ff985d04bb2d8f427563a6e257b8f6.js?ver=9a9b4"></script></body>
</html>
Note:- make a home.html in templates/posts so that when the authentication is done, then the page will get redirected to home page
Feature 2: Post Creation
—the Post Creation feature in these project is more advanced and includes:
- Carousel for Multiple Images: Users can upload multiple images for a single post.
- Edit Post: Users can edit their posts (caption, hashtags, and images).
- Delete Post: Users can delete their posts.
- Like Post: Users can like/unlike posts.
- Comment on Posts: Users can add comments to posts.
Let’s expand the Post Creation feature to include all these functionalities. I’ll break it down step by step.
- Post Model with Multiple Images
Update the Post model in posts/models.py to support multiple images using a separate PostImage model:
					from django.db import models
from django.contrib.auth import get_user_model

User = get_user_model()

class Post(models.Model):
    user = models.ForeignKey(User, on_delete=models.CASCADE)
    caption = models.TextField()
    hashtags = models.CharField(max_length=255, blank=True, null=True)
    created_at = models.DateTimeField(auto_now_add=True)
    likes = models.ManyToManyField(User, related_name='liked_posts', blank=True)

    def total_likes(self):
        return self.likes.count()

    def __str__(self):
        return f"{self.user.username} - {self.caption[:20]}"

class PostImage(models.Model):
    post = models.ForeignKey(Post, on_delete=models.CASCADE, related_name='images')
    image = models.ImageField(upload_to='post_images/')

    def __str__(self):
        return f"Image for {self.post.caption[:20]}"
Run migrations to apply the changes:
					python manage.py makemigrations
python manage.py migrate
- Post Form for Multiple Images
Update the PostForm in posts/forms.py to handle multiple images:
					from django import forms
from .models import Post

class PostForm(forms.ModelForm):
    class Meta:
        model = Post
        fields = ['caption', 'hashtags']
- Post Views
Update the create_post view in posts/views.py to handle multiple images:
					from django.shortcuts import render, redirect, get_object_or_404
from .forms import PostForm
from .models import Post, PostImage

@login_required
def create_post(request):
    if request.method == 'POST':
        form = PostForm(request.POST)
        if form.is_valid():
            post = form.save(commit=False)
            post.user = request.user
            post.save()

            # Handle multiple image uploads
            for image in request.FILES.getlist('images'):
                PostImage.objects.create(post=post, image=image)

            return redirect('home')
    else:
        form = PostForm()
    return render(request, 'posts/create_post.html', {'form': form})

@login_required
def edit_post(request, post_id):
    post = get_object_or_404(Post, id=post_id, user=request.user)
    if request.method == 'POST':
        form = PostForm(request.POST, instance=post)
        if form.is_valid():
            form.save()

            # Handle new image uploads
            for image in request.FILES.getlist('images'):
                PostImage.objects.create(post=post, image=image)

            return redirect('profile', username=request.user.username)
    else:
        form = PostForm(instance=post)
    return render(request, 'posts/edit_post.html', {'form': form, 'post': post})

@login_required
def delete_post(request, post_id):
    post = get_object_or_404(Post, id=post_id, user=request.user)
    post.delete()
    return redirect('home')
- Like Post
Add the like_post view in posts/views.py:
					from django.http import JsonResponse

@login_required
def like_post(request, post_id):
    post = get_object_or_404(Post, id=post_id)
    if request.user in post.likes.all():
        post.likes.remove(request.user)
        liked = False
    else:
        post.likes.add(request.user)
        liked = True
    return JsonResponse({'liked': liked, 'total_likes': post.total_likes()})
- Comment on Post
Add the Comment model in posts/models.py:
					class Comment(models.Model):
    post = models.ForeignKey(Post, on_delete=models.CASCADE, related_name='comments')
    user = models.ForeignKey(User, on_delete=models.CASCADE)
    text = models.TextField()
    created_at = models.DateTimeField(auto_now_add=True)

    def __str__(self):
        return f"{self.user.username}: {self.text}"
Add the CommentForm in posts/forms.py:
python
Copy
from .models import Comment

class CommentForm(forms.ModelForm):
    class Meta:
        model = Comment
        fields = ['text']
Add the add_comment view in posts/views.py:
python
Copy
from .forms import CommentForm

@login_required
def add_comment(request, post_id):
    post = get_object_or_404(Post, id=post_id)
    if request.method == 'POST':
        form = CommentForm(request.POST)
        if form.is_valid():
            comment = form.save(commit=False)
            comment.post = post
            comment.user = request.user
            comment.save()
    return redirect('home')
- Templates
- create_post.html: Template for uploading posts with multiple images.
- edit_post.html: Template for editing posts.
- home.html: Template for displaying posts with like and comment options.
Templates/posts/create_post.html:
{% load static %}
<!DOCTYPE html>
<html lang=”en”>
<head>
<meta charset=”UTF-8″>
<meta name=”viewport” content=”width=device-width, initial-scale=1.0″>
<title>Create New Post • Instagram</title>
<link rel=”stylesheet” href=”https://cdn.jsdelivr.net/npm/bootstrap@5.3.0/dist/css/bootstrap.min.css”>
<script src=”https://kit.fontawesome.com/a076d05399.js” crossorigin=”anonymous”></script>
<style>
/* General Page Styling */
body {
background-color: #fafafa;
font-family: ‘Helvetica Neue’, Arial, sans-serif;
}
/* Navbar */
.navbar {
background: white;
padding: 10px 20px;
border-bottom: 1px solid #dbdbdb;
box-shadow: 0px 2px 5px rgba(0, 0, 0, 0.05);
}
.navbar-brand img {
height: 30px;
}
.nav-icon {
font-size: 20px;
margin: 0 10px;
color: #333;
cursor: pointer;
}
.nav-icon:hover {
color: #000;
}
.profile-pic {
width: 32px;
height: 32px;
border-radius: 50%;
object-fit: cover;
}
/* Post Creation Box */
.post-container {
width: 400px;
background: white;
padding: 20px;
border-radius: 12px;
box-shadow: 0px 4px 10px rgba(0, 0, 0, 0.1);
text-align: center;
border: 1px solid #dbdbdb;
margin: 80px auto;
}
/* Upload Box */
.upload-box {
width: 100%;
padding: 40px 20px;
background: #fafafa;
border: 2px dashed #dbdbdb;
border-radius: 8px;
cursor: pointer;
transition: 0.3s;
}
.upload-box:hover {
background: #f1f1f1;
}
.upload-label {
display: flex;
flex-direction: column;
align-items: center;
cursor: pointer;
color: #555;
font-size: 14px;
}
.upload-label i {
font-size: 40px;
margin-bottom: 10px;
color: #0095f6;
}
/* Inputs */
.form-control {
border: 1px solid #dbdbdb;
border-radius: 6px;
font-size: 14px;
padding: 10px;
}
.caption-input {
resize: none;
}
/* Submit Button */
.btn-primary {
background-color: #0095f6;
border: none;
font-weight: bold;
border-radius: 8px;
padding: 10px;
}
.btn-primary:hover {
background-color: #0077cc;
}
</style>
</head>
<body>


    <nav class="navbar navbar-expand-lg navbar-light fixed-top">
        <div class="container">
            <a class="navbar-brand" href="{% url 'home' %}">
                <img decoding="async" src="{% static 'images/instagram.png' %}" alt="Instagram">
                instagram
            </a>
            <div class="d-flex align-items-center">
                <a href="{% url 'home' %}" class="nav-icon"><i class="fas fa-home"></i></a>
                <a href="#" class="nav-icon"><i class="fas fa-search"></i></a>
                <a href="{% url 'create_post' %}" class="nav-icon"><i class="fas fa-plus-square"></i></a>
                <a href="#" class="nav-icon"><i class="far fa-heart"></i></a>
                {% if request.user.is_authenticated %}
                <a href="{% url 'profile' request.user.username %}">
                    <button>Profile
                        <img decoding="async" src="{% static 'images/Profile_pic.jpg' %}" class="profile-pic" alt="Profile">
                    </button>
                </a>
                {% else %}
                <a href="{% url 'login' %}">Login</a>
                {% endif %}

            </div>
        </div>
    </nav>


    <div class="container mt-5 post-container">
        <h2>Create Post</h2>
        <form method="POST" enctype="multipart/form-data">
            {% csrf_token %}
            <div class="mb-3">
                <label class="form-label">Caption</label>
                <textarea name="caption" class="form-control" required></textarea>
            </div>
            <div class="mb-3">
                <label class="form-label">Hashtags (comma-separated)</label>
                <input type="text" name="hashtags" class="form-control">
            </div>


            <div class="mb-3">
                <label class="form-label">Upload Single Image</label>
                <input type="file" name="single_image" class="form-control">
            </div>


            <div class="mb-3">
                <label class="form-label">Upload Multiple Images</label>
                <input type="file" name="multiple_images" class="form-control" multiple>
            </div>

            <button type="submit" class="btn btn-primary">Post</button>
        </form>
    </div> <script type="litespeed/javascript" data-src="https://cdn.jsdelivr.net/npm/bootstrap@5.3.0/dist/js/bootstrap.bundle.min.js"></script> <script data-no-optimize="1">window.lazyLoadOptions=Object.assign({},{threshold:300},window.lazyLoadOptions||{});!function(t,e){"object"==typeof exports&&"undefined"!=typeof module?module.exports=e():"function"==typeof define&&define.amd?define(e):(t="undefined"!=typeof globalThis?globalThis:t||self).LazyLoad=e()}(this,function(){"use strict";function e(){return(e=Object.assign||function(t){for(var e=1;e<arguments.length;e++){var n,a=arguments[e];for(n in a)Object.prototype.hasOwnProperty.call(a,n)&&(t[n]=a[n])}return t}).apply(this,arguments)}function o(t){return e({},at,t)}function l(t,e){return t.getAttribute(gt+e)}function c(t){return l(t,vt)}function s(t,e){return function(t,e,n){e=gt+e;null!==n?t.setAttribute(e,n):t.removeAttribute(e)}(t,vt,e)}function i(t){return s(t,null),0}function r(t){return null===c(t)}function u(t){return c(t)===_t}function d(t,e,n,a){t&&(void 0===a?void 0===n?t(e):t(e,n):t(e,n,a))}function f(t,e){et?t.classList.add(e):t.className+=(t.className?" ":"")+e}function _(t,e){et?t.classList.remove(e):t.className=t.className.replace(new RegExp("(^|\\s+)"+e+"(\\s+|$)")," ").replace(/^\s+/,"").replace(/\s+$/,"")}function g(t){return t.llTempImage}function v(t,e){!e||(e=e._observer)&&e.unobserve(t)}function b(t,e){t&&(t.loadingCount+=e)}function p(t,e){t&&(t.toLoadCount=e)}function n(t){for(var e,n=[],a=0;e=t.children[a];a+=1)"SOURCE"===e.tagName&&n.push(e);return n}function h(t,e){(t=t.parentNode)&&"PICTURE"===t.tagName&&n(t).forEach(e)}function a(t,e){n(t).forEach(e)}function m(t){return!!t[lt]}function E(t){return t[lt]}function I(t){return delete t[lt]}function y(e,t){var n;m(e)||(n={},t.forEach(function(t){n[t]=e.getAttribute(t)}),e[lt]=n)}function L(a,t){var o;m(a)&&(o=E(a),t.forEach(function(t){var e,n;e=a,(t=o[n=t])?e.setAttribute(n,t):e.removeAttribute(n)}))}function k(t,e,n){f(t,e.class_loading),s(t,st),n&&(b(n,1),d(e.callback_loading,t,n))}function A(t,e,n){n&&t.setAttribute(e,n)}function O(t,e){A(t,rt,l(t,e.data_sizes)),A(t,it,l(t,e.data_srcset)),A(t,ot,l(t,e.data_src))}function w(t,e,n){var a=l(t,e.data_bg_multi),o=l(t,e.data_bg_multi_hidpi);(a=nt&&o?o:a)&&(t.style.backgroundImage=a,n=n,f(t=t,(e=e).class_applied),s(t,dt),n&&(e.unobserve_completed&&v(t,e),d(e.callback_applied,t,n)))}function x(t,e){!e||0<e.loadingCount||0<e.toLoadCount||d(t.callback_finish,e)}function M(t,e,n){t.addEventListener(e,n),t.llEvLisnrs[e]=n}function N(t){return!!t.llEvLisnrs}function z(t){if(N(t)){var e,n,a=t.llEvLisnrs;for(e in a){var o=a[e];n=e,o=o,t.removeEventListener(n,o)}delete t.llEvLisnrs}}function C(t,e,n){var a;delete t.llTempImage,b(n,-1),(a=n)&&--a.toLoadCount,_(t,e.class_loading),e.unobserve_completed&&v(t,n)}function R(i,r,c){var l=g(i)||i;N(l)||function(t,e,n){N(t)||(t.llEvLisnrs={});var a="VIDEO"===t.tagName?"loadeddata":"load";M(t,a,e),M(t,"error",n)}(l,function(t){var e,n,a,o;n=r,a=c,o=u(e=i),C(e,n,a),f(e,n.class_loaded),s(e,ut),d(n.callback_loaded,e,a),o||x(n,a),z(l)},function(t){var e,n,a,o;n=r,a=c,o=u(e=i),C(e,n,a),f(e,n.class_error),s(e,ft),d(n.callback_error,e,a),o||x(n,a),z(l)})}function T(t,e,n){var a,o,i,r,c;t.llTempImage=document.createElement("IMG"),R(t,e,n),m(c=t)||(c[lt]={backgroundImage:c.style.backgroundImage}),i=n,r=l(a=t,(o=e).data_bg),c=l(a,o.data_bg_hidpi),(r=nt&&c?c:r)&&(a.style.backgroundImage='url("'.concat(r,'")'),g(a).setAttribute(ot,r),k(a,o,i)),w(t,e,n)}function G(t,e,n){var a;R(t,e,n),a=e,e=n,(t=Et[(n=t).tagName])&&(t(n,a),k(n,a,e))}function D(t,e,n){var a;a=t,(-1<It.indexOf(a.tagName)?G:T)(t,e,n)}function S(t,e,n){var a;t.setAttribute("loading","lazy"),R(t,e,n),a=e,(e=Et[(n=t).tagName])&&e(n,a),s(t,_t)}function V(t){t.removeAttribute(ot),t.removeAttribute(it),t.removeAttribute(rt)}function j(t){h(t,function(t){L(t,mt)}),L(t,mt)}function F(t){var e;(e=yt[t.tagName])?e(t):m(e=t)&&(t=E(e),e.style.backgroundImage=t.backgroundImage)}function P(t,e){var n;F(t),n=e,r(e=t)||u(e)||(_(e,n.class_entered),_(e,n.class_exited),_(e,n.class_applied),_(e,n.class_loading),_(e,n.class_loaded),_(e,n.class_error)),i(t),I(t)}function U(t,e,n,a){var o;n.cancel_on_exit&&(c(t)!==st||"IMG"===t.tagName&&(z(t),h(o=t,function(t){V(t)}),V(o),j(t),_(t,n.class_loading),b(a,-1),i(t),d(n.callback_cancel,t,e,a)))}function $(t,e,n,a){var o,i,r=(i=t,0<=bt.indexOf(c(i)));s(t,"entered"),f(t,n.class_entered),_(t,n.class_exited),o=t,i=a,n.unobserve_entered&&v(o,i),d(n.callback_enter,t,e,a),r||D(t,n,a)}function q(t){return t.use_native&&"loading"in HTMLImageElement.prototype}function H(t,o,i){t.forEach(function(t){return(a=t).isIntersecting||0<a.intersectionRatio?$(t.target,t,o,i):(e=t.target,n=t,a=o,t=i,void(r(e)||(f(e,a.class_exited),U(e,n,a,t),d(a.callback_exit,e,n,t))));var e,n,a})}function B(e,n){var t;tt&&!q(e)&&(n._observer=new IntersectionObserver(function(t){H(t,e,n)},{root:(t=e).container===document?null:t.container,rootMargin:t.thresholds||t.threshold+"px"}))}function J(t){return Array.prototype.slice.call(t)}function K(t){return t.container.querySelectorAll(t.elements_selector)}function Q(t){return c(t)===ft}function W(t,e){return e=t||K(e),J(e).filter(r)}function X(e,t){var n;(n=K(e),J(n).filter(Q)).forEach(function(t){_(t,e.class_error),i(t)}),t.update()}function t(t,e){var n,a,t=o(t);this._settings=t,this.loadingCount=0,B(t,this),n=t,a=this,Y&&window.addEventListener("online",function(){X(n,a)}),this.update(e)}var Y="undefined"!=typeof window,Z=Y&&!("onscroll"in window)||"undefined"!=typeof navigator&&/(gle|ing|ro)bot|crawl|spider/i.test(navigator.userAgent),tt=Y&&"IntersectionObserver"in window,et=Y&&"classList"in document.createElement("p"),nt=Y&&1<window.devicePixelRatio,at={elements_selector:".lazy",container:Z||Y?document:null,threshold:300,thresholds:null,data_src:"src",data_srcset:"srcset",data_sizes:"sizes",data_bg:"bg",data_bg_hidpi:"bg-hidpi",data_bg_multi:"bg-multi",data_bg_multi_hidpi:"bg-multi-hidpi",data_poster:"poster",class_applied:"applied",class_loading:"litespeed-loading",class_loaded:"litespeed-loaded",class_error:"error",class_entered:"entered",class_exited:"exited",unobserve_completed:!0,unobserve_entered:!1,cancel_on_exit:!0,callback_enter:null,callback_exit:null,callback_applied:null,callback_loading:null,callback_loaded:null,callback_error:null,callback_finish:null,callback_cancel:null,use_native:!1},ot="src",it="srcset",rt="sizes",ct="poster",lt="llOriginalAttrs",st="loading",ut="loaded",dt="applied",ft="error",_t="native",gt="data-",vt="ll-status",bt=[st,ut,dt,ft],pt=[ot],ht=[ot,ct],mt=[ot,it,rt],Et={IMG:function(t,e){h(t,function(t){y(t,mt),O(t,e)}),y(t,mt),O(t,e)},IFRAME:function(t,e){y(t,pt),A(t,ot,l(t,e.data_src))},VIDEO:function(t,e){a(t,function(t){y(t,pt),A(t,ot,l(t,e.data_src))}),y(t,ht),A(t,ct,l(t,e.data_poster)),A(t,ot,l(t,e.data_src)),t.load()}},It=["IMG","IFRAME","VIDEO"],yt={IMG:j,IFRAME:function(t){L(t,pt)},VIDEO:function(t){a(t,function(t){L(t,pt)}),L(t,ht),t.load()}},Lt=["IMG","IFRAME","VIDEO"];return t.prototype={update:function(t){var e,n,a,o=this._settings,i=W(t,o);{if(p(this,i.length),!Z&&tt)return q(o)?(e=o,n=this,i.forEach(function(t){-1!==Lt.indexOf(t.tagName)&&S(t,e,n)}),void p(n,0)):(t=this._observer,o=i,t.disconnect(),a=t,void o.forEach(function(t){a.observe(t)}));this.loadAll(i)}},destroy:function(){this._observer&&this._observer.disconnect(),K(this._settings).forEach(function(t){I(t)}),delete this._observer,delete this._settings,delete this.loadingCount,delete this.toLoadCount},loadAll:function(t){var e=this,n=this._settings;W(t,n).forEach(function(t){v(t,e),D(t,n,e)})},restoreAll:function(){var e=this._settings;K(e).forEach(function(t){P(t,e)})}},t.load=function(t,e){e=o(e);D(t,e)},t.resetStatus=function(t){i(t)},t}),function(t,e){"use strict";function n(){e.body.classList.add("litespeed_lazyloaded")}function a(){console.log("[LiteSpeed] Start Lazy Load"),o=new LazyLoad(Object.assign({},t.lazyLoadOptions||{},{elements_selector:"[data-lazyloaded]",callback_finish:n})),i=function(){o.update()},t.MutationObserver&&new MutationObserver(i).observe(e.documentElement,{childList:!0,subtree:!0,attributes:!0})}var o,i;t.addEventListener?t.addEventListener("load",a,!1):t.attachEvent("onload",a)}(window,document);</script><script data-no-optimize="1">window.litespeed_ui_events=window.litespeed_ui_events||["mouseover","click","keydown","wheel","touchmove","touchstart"];var urlCreator=window.URL||window.webkitURL;function litespeed_load_delayed_js_force(){console.log("[LiteSpeed] Start Load JS Delayed"),litespeed_ui_events.forEach(e=>{window.removeEventListener(e,litespeed_load_delayed_js_force,{passive:!0})}),document.querySelectorAll("iframe[data-litespeed-src]").forEach(e=>{e.setAttribute("src",e.getAttribute("data-litespeed-src"))}),"loading"==document.readyState?window.addEventListener("DOMContentLoaded",litespeed_load_delayed_js):litespeed_load_delayed_js()}litespeed_ui_events.forEach(e=>{window.addEventListener(e,litespeed_load_delayed_js_force,{passive:!0})});async function litespeed_load_delayed_js(){let t=[];for(var d in document.querySelectorAll('script[type="litespeed/javascript"]').forEach(e=>{t.push(e)}),t)await new Promise(e=>litespeed_load_one(t[d],e));document.dispatchEvent(new Event("DOMContentLiteSpeedLoaded")),window.dispatchEvent(new Event("DOMContentLiteSpeedLoaded"))}function litespeed_load_one(t,e){console.log("[LiteSpeed] Load ",t);var d=document.createElement("script");d.addEventListener("load",e),d.addEventListener("error",e),t.getAttributeNames().forEach(e=>{"type"!=e&&d.setAttribute("data-src"==e?"src":e,t.getAttribute(e))});let a=!(d.type="text/javascript");!d.src&&t.textContent&&(d.src=litespeed_inline2src(t.textContent),a=!0),t.after(d),t.remove(),a&&e()}function litespeed_inline2src(t){try{var d=urlCreator.createObjectURL(new Blob([t.replace(/^(?:<!--)?(.*?)(?:-->)?$/gm,"$1")],{type:"text/javascript"}))}catch(e){d="data:text/javascript;base64,"+btoa(t.replace(/^(?:<!--)?(.*?)(?:-->)?$/gm,"$1"))}return d}</script><script data-optimized="1" type="litespeed/javascript" data-src="https://techamplifiers.com/wp-content/litespeed/js/d0ff985d04bb2d8f427563a6e257b8f6.js?ver=9a9b4"></script></body>

</html>
templates/posts/edit_post.html:
					{% load static %}

<!DOCTYPE html>
<html lang="en">

<head>
<title>Edit Post - {{ post.user.username }}</title>
<link rel="stylesheet" href="https://cdn.jsdelivr.net/npm/bootstrap@5.3.0/dist/css/bootstrap.min.css"> <script type="litespeed/javascript" data-src="https://cdn.jsdelivr.net/npm/bootstrap@5.3.0/dist/js/bootstrap.bundle.min.js"></script> </head>

<body>

<nav class="navbar navbar-light bg-white border-bottom shadow-sm">
<div class="container d-flex justify-content-between">
<a class="navbar-brand fw-bold" href="{% url 'home' %}">
<img decoding="async" style="width: 10%; margin: 10px;" src="{% static 'images/instagram.png' %}">Instagram</a>
<div>
<a href="{% url 'profile' user.username %}" class="btn btn-outline-primary">Back to Profile</a>
</div>
</div>
</nav>


<div class="container mt-5">
<h2>Edit Post</h2>
<form action="{% url 'edit_post' post.id %}" method="POST" enctype="multipart/form-data">
{% csrf_token %}
<div class="mb-3">
<label for="caption" class="form-label">Caption</label>
<textarea class="form-control" id="caption" name="caption" rows="3">{{ post.caption }}</textarea>
</div>
<div class="mb-3">
<label for="hashtags" class="form-label">Hashtags</label>
<input type="text" class="form-control" id="hashtags" name="hashtags" value="{{ post.hashtags }}">
</div>


<div class="mb-3">
<label class="form-label">Current Images</label>
<div class="d-flex flex-wrap">
{% for image in post.images.all %}
<div class="me-2 mb-2">
<img decoding="async" src="{{ image.image.url }}" alt="Current Image" style="max-width: 200px; max-height: 200px; border-radius: 5px;">
</div>
{% empty %}
<p class="text-muted">No images uploaded.</p>
{% endfor %}
</div>
</div>


<div class="mb-3">
<label for="new_images" class="form-label">Upload New Images (Optional)</label>
<input type="file" class="form-control" id="new_images" name="images" multiple>
</div>

<button type="submit" class="btn btn-primary">Save Changes</button>
</form>
</div> <script data-no-optimize="1">window.lazyLoadOptions=Object.assign({},{threshold:300},window.lazyLoadOptions||{});!function(t,e){"object"==typeof exports&&"undefined"!=typeof module?module.exports=e():"function"==typeof define&&define.amd?define(e):(t="undefined"!=typeof globalThis?globalThis:t||self).LazyLoad=e()}(this,function(){"use strict";function e(){return(e=Object.assign||function(t){for(var e=1;e<arguments.length;e++){var n,a=arguments[e];for(n in a)Object.prototype.hasOwnProperty.call(a,n)&&(t[n]=a[n])}return t}).apply(this,arguments)}function o(t){return e({},at,t)}function l(t,e){return t.getAttribute(gt+e)}function c(t){return l(t,vt)}function s(t,e){return function(t,e,n){e=gt+e;null!==n?t.setAttribute(e,n):t.removeAttribute(e)}(t,vt,e)}function i(t){return s(t,null),0}function r(t){return null===c(t)}function u(t){return c(t)===_t}function d(t,e,n,a){t&&(void 0===a?void 0===n?t(e):t(e,n):t(e,n,a))}function f(t,e){et?t.classList.add(e):t.className+=(t.className?" ":"")+e}function _(t,e){et?t.classList.remove(e):t.className=t.className.replace(new RegExp("(^|\\s+)"+e+"(\\s+|$)")," ").replace(/^\s+/,"").replace(/\s+$/,"")}function g(t){return t.llTempImage}function v(t,e){!e||(e=e._observer)&&e.unobserve(t)}function b(t,e){t&&(t.loadingCount+=e)}function p(t,e){t&&(t.toLoadCount=e)}function n(t){for(var e,n=[],a=0;e=t.children[a];a+=1)"SOURCE"===e.tagName&&n.push(e);return n}function h(t,e){(t=t.parentNode)&&"PICTURE"===t.tagName&&n(t).forEach(e)}function a(t,e){n(t).forEach(e)}function m(t){return!!t[lt]}function E(t){return t[lt]}function I(t){return delete t[lt]}function y(e,t){var n;m(e)||(n={},t.forEach(function(t){n[t]=e.getAttribute(t)}),e[lt]=n)}function L(a,t){var o;m(a)&&(o=E(a),t.forEach(function(t){var e,n;e=a,(t=o[n=t])?e.setAttribute(n,t):e.removeAttribute(n)}))}function k(t,e,n){f(t,e.class_loading),s(t,st),n&&(b(n,1),d(e.callback_loading,t,n))}function A(t,e,n){n&&t.setAttribute(e,n)}function O(t,e){A(t,rt,l(t,e.data_sizes)),A(t,it,l(t,e.data_srcset)),A(t,ot,l(t,e.data_src))}function w(t,e,n){var a=l(t,e.data_bg_multi),o=l(t,e.data_bg_multi_hidpi);(a=nt&&o?o:a)&&(t.style.backgroundImage=a,n=n,f(t=t,(e=e).class_applied),s(t,dt),n&&(e.unobserve_completed&&v(t,e),d(e.callback_applied,t,n)))}function x(t,e){!e||0<e.loadingCount||0<e.toLoadCount||d(t.callback_finish,e)}function M(t,e,n){t.addEventListener(e,n),t.llEvLisnrs[e]=n}function N(t){return!!t.llEvLisnrs}function z(t){if(N(t)){var e,n,a=t.llEvLisnrs;for(e in a){var o=a[e];n=e,o=o,t.removeEventListener(n,o)}delete t.llEvLisnrs}}function C(t,e,n){var a;delete t.llTempImage,b(n,-1),(a=n)&&--a.toLoadCount,_(t,e.class_loading),e.unobserve_completed&&v(t,n)}function R(i,r,c){var l=g(i)||i;N(l)||function(t,e,n){N(t)||(t.llEvLisnrs={});var a="VIDEO"===t.tagName?"loadeddata":"load";M(t,a,e),M(t,"error",n)}(l,function(t){var e,n,a,o;n=r,a=c,o=u(e=i),C(e,n,a),f(e,n.class_loaded),s(e,ut),d(n.callback_loaded,e,a),o||x(n,a),z(l)},function(t){var e,n,a,o;n=r,a=c,o=u(e=i),C(e,n,a),f(e,n.class_error),s(e,ft),d(n.callback_error,e,a),o||x(n,a),z(l)})}function T(t,e,n){var a,o,i,r,c;t.llTempImage=document.createElement("IMG"),R(t,e,n),m(c=t)||(c[lt]={backgroundImage:c.style.backgroundImage}),i=n,r=l(a=t,(o=e).data_bg),c=l(a,o.data_bg_hidpi),(r=nt&&c?c:r)&&(a.style.backgroundImage='url("'.concat(r,'")'),g(a).setAttribute(ot,r),k(a,o,i)),w(t,e,n)}function G(t,e,n){var a;R(t,e,n),a=e,e=n,(t=Et[(n=t).tagName])&&(t(n,a),k(n,a,e))}function D(t,e,n){var a;a=t,(-1<It.indexOf(a.tagName)?G:T)(t,e,n)}function S(t,e,n){var a;t.setAttribute("loading","lazy"),R(t,e,n),a=e,(e=Et[(n=t).tagName])&&e(n,a),s(t,_t)}function V(t){t.removeAttribute(ot),t.removeAttribute(it),t.removeAttribute(rt)}function j(t){h(t,function(t){L(t,mt)}),L(t,mt)}function F(t){var e;(e=yt[t.tagName])?e(t):m(e=t)&&(t=E(e),e.style.backgroundImage=t.backgroundImage)}function P(t,e){var n;F(t),n=e,r(e=t)||u(e)||(_(e,n.class_entered),_(e,n.class_exited),_(e,n.class_applied),_(e,n.class_loading),_(e,n.class_loaded),_(e,n.class_error)),i(t),I(t)}function U(t,e,n,a){var o;n.cancel_on_exit&&(c(t)!==st||"IMG"===t.tagName&&(z(t),h(o=t,function(t){V(t)}),V(o),j(t),_(t,n.class_loading),b(a,-1),i(t),d(n.callback_cancel,t,e,a)))}function $(t,e,n,a){var o,i,r=(i=t,0<=bt.indexOf(c(i)));s(t,"entered"),f(t,n.class_entered),_(t,n.class_exited),o=t,i=a,n.unobserve_entered&&v(o,i),d(n.callback_enter,t,e,a),r||D(t,n,a)}function q(t){return t.use_native&&"loading"in HTMLImageElement.prototype}function H(t,o,i){t.forEach(function(t){return(a=t).isIntersecting||0<a.intersectionRatio?$(t.target,t,o,i):(e=t.target,n=t,a=o,t=i,void(r(e)||(f(e,a.class_exited),U(e,n,a,t),d(a.callback_exit,e,n,t))));var e,n,a})}function B(e,n){var t;tt&&!q(e)&&(n._observer=new IntersectionObserver(function(t){H(t,e,n)},{root:(t=e).container===document?null:t.container,rootMargin:t.thresholds||t.threshold+"px"}))}function J(t){return Array.prototype.slice.call(t)}function K(t){return t.container.querySelectorAll(t.elements_selector)}function Q(t){return c(t)===ft}function W(t,e){return e=t||K(e),J(e).filter(r)}function X(e,t){var n;(n=K(e),J(n).filter(Q)).forEach(function(t){_(t,e.class_error),i(t)}),t.update()}function t(t,e){var n,a,t=o(t);this._settings=t,this.loadingCount=0,B(t,this),n=t,a=this,Y&&window.addEventListener("online",function(){X(n,a)}),this.update(e)}var Y="undefined"!=typeof window,Z=Y&&!("onscroll"in window)||"undefined"!=typeof navigator&&/(gle|ing|ro)bot|crawl|spider/i.test(navigator.userAgent),tt=Y&&"IntersectionObserver"in window,et=Y&&"classList"in document.createElement("p"),nt=Y&&1<window.devicePixelRatio,at={elements_selector:".lazy",container:Z||Y?document:null,threshold:300,thresholds:null,data_src:"src",data_srcset:"srcset",data_sizes:"sizes",data_bg:"bg",data_bg_hidpi:"bg-hidpi",data_bg_multi:"bg-multi",data_bg_multi_hidpi:"bg-multi-hidpi",data_poster:"poster",class_applied:"applied",class_loading:"litespeed-loading",class_loaded:"litespeed-loaded",class_error:"error",class_entered:"entered",class_exited:"exited",unobserve_completed:!0,unobserve_entered:!1,cancel_on_exit:!0,callback_enter:null,callback_exit:null,callback_applied:null,callback_loading:null,callback_loaded:null,callback_error:null,callback_finish:null,callback_cancel:null,use_native:!1},ot="src",it="srcset",rt="sizes",ct="poster",lt="llOriginalAttrs",st="loading",ut="loaded",dt="applied",ft="error",_t="native",gt="data-",vt="ll-status",bt=[st,ut,dt,ft],pt=[ot],ht=[ot,ct],mt=[ot,it,rt],Et={IMG:function(t,e){h(t,function(t){y(t,mt),O(t,e)}),y(t,mt),O(t,e)},IFRAME:function(t,e){y(t,pt),A(t,ot,l(t,e.data_src))},VIDEO:function(t,e){a(t,function(t){y(t,pt),A(t,ot,l(t,e.data_src))}),y(t,ht),A(t,ct,l(t,e.data_poster)),A(t,ot,l(t,e.data_src)),t.load()}},It=["IMG","IFRAME","VIDEO"],yt={IMG:j,IFRAME:function(t){L(t,pt)},VIDEO:function(t){a(t,function(t){L(t,pt)}),L(t,ht),t.load()}},Lt=["IMG","IFRAME","VIDEO"];return t.prototype={update:function(t){var e,n,a,o=this._settings,i=W(t,o);{if(p(this,i.length),!Z&&tt)return q(o)?(e=o,n=this,i.forEach(function(t){-1!==Lt.indexOf(t.tagName)&&S(t,e,n)}),void p(n,0)):(t=this._observer,o=i,t.disconnect(),a=t,void o.forEach(function(t){a.observe(t)}));this.loadAll(i)}},destroy:function(){this._observer&&this._observer.disconnect(),K(this._settings).forEach(function(t){I(t)}),delete this._observer,delete this._settings,delete this.loadingCount,delete this.toLoadCount},loadAll:function(t){var e=this,n=this._settings;W(t,n).forEach(function(t){v(t,e),D(t,n,e)})},restoreAll:function(){var e=this._settings;K(e).forEach(function(t){P(t,e)})}},t.load=function(t,e){e=o(e);D(t,e)},t.resetStatus=function(t){i(t)},t}),function(t,e){"use strict";function n(){e.body.classList.add("litespeed_lazyloaded")}function a(){console.log("[LiteSpeed] Start Lazy Load"),o=new LazyLoad(Object.assign({},t.lazyLoadOptions||{},{elements_selector:"[data-lazyloaded]",callback_finish:n})),i=function(){o.update()},t.MutationObserver&&new MutationObserver(i).observe(e.documentElement,{childList:!0,subtree:!0,attributes:!0})}var o,i;t.addEventListener?t.addEventListener("load",a,!1):t.attachEvent("onload",a)}(window,document);</script><script data-no-optimize="1">window.litespeed_ui_events=window.litespeed_ui_events||["mouseover","click","keydown","wheel","touchmove","touchstart"];var urlCreator=window.URL||window.webkitURL;function litespeed_load_delayed_js_force(){console.log("[LiteSpeed] Start Load JS Delayed"),litespeed_ui_events.forEach(e=>{window.removeEventListener(e,litespeed_load_delayed_js_force,{passive:!0})}),document.querySelectorAll("iframe[data-litespeed-src]").forEach(e=>{e.setAttribute("src",e.getAttribute("data-litespeed-src"))}),"loading"==document.readyState?window.addEventListener("DOMContentLoaded",litespeed_load_delayed_js):litespeed_load_delayed_js()}litespeed_ui_events.forEach(e=>{window.addEventListener(e,litespeed_load_delayed_js_force,{passive:!0})});async function litespeed_load_delayed_js(){let t=[];for(var d in document.querySelectorAll('script[type="litespeed/javascript"]').forEach(e=>{t.push(e)}),t)await new Promise(e=>litespeed_load_one(t[d],e));document.dispatchEvent(new Event("DOMContentLiteSpeedLoaded")),window.dispatchEvent(new Event("DOMContentLiteSpeedLoaded"))}function litespeed_load_one(t,e){console.log("[LiteSpeed] Load ",t);var d=document.createElement("script");d.addEventListener("load",e),d.addEventListener("error",e),t.getAttributeNames().forEach(e=>{"type"!=e&&d.setAttribute("data-src"==e?"src":e,t.getAttribute(e))});let a=!(d.type="text/javascript");!d.src&&t.textContent&&(d.src=litespeed_inline2src(t.textContent),a=!0),t.after(d),t.remove(),a&&e()}function litespeed_inline2src(t){try{var d=urlCreator.createObjectURL(new Blob([t.replace(/^(?:<!--)?(.*?)(?:-->)?$/gm,"$1")],{type:"text/javascript"}))}catch(e){d="data:text/javascript;base64,"+btoa(t.replace(/^(?:<!--)?(.*?)(?:-->)?$/gm,"$1"))}return d}</script><script data-optimized="1" type="litespeed/javascript" data-src="https://techamplifiers.com/wp-content/litespeed/js/d0ff985d04bb2d8f427563a6e257b8f6.js?ver=9a9b4"></script></body>
</html>
Templates/posts/home.html:
(only the post relation portion of home.html is included here, the styling could be done you yourself as per your choice)
<div class="container mt-4 feed-container">
    {% for post in posts %}
    <div class="post-card">

        <div class="post-header">
            <a href="{% url 'profile' post.user.username %}" class="d-flex align-items-center text-decoration-none">
                <img decoding="async" src="{% if post.user.profile.profile_pic %}{{ post.user.profile.profile_pic.url }}{% else %}{% static 'images/default_profile.jpg' %}{% endif %}"
                    class="profile-pic" alt="{{ post.user.username }}">
                <h6 class="fw-bold mb-0 ms-2 post-username">{{ post.user.username }}</h6>
            </a>
        </div>


        {% if post.images.all|length > 1 %}

        <div id="carousel{{ post.id }}" class="carousel slide" data-bs-ride="carousel">
            <div class="carousel-inner">
                {% for image in post.images.all %}
                <div class="carousel-item {% if forloop.first %}active{% endif %}">
                    <img decoding="async" src="{{ image.image.url }}" class="post-img d-block w-100" alt="Post Image">
                </div>
                {% endfor %}
            </div>


            <button class="carousel-control-prev" type="button" data-bs-target="#carousel{{ post.id }}"
                data-bs-slide="prev">
                <span class="carousel-control-prev-icon" aria-hidden="true"></span>
            </button>
            <button class="carousel-control-next" type="button" data-bs-target="#carousel{{ post.id }}"
                data-bs-slide="next">
                <span class="carousel-control-next-icon" aria-hidden="true"></span>
            </button>
        </div>

        {% elif post.images.all|length == 1 %}

        <img decoding="async" src="{{ post.images.all.0.image.url }}" class="post-img d-block w-100" alt="Post Image">
        {% endif %}


        <div class="post-body">
            <p class="fw-bold"><span class="post-username">{{ post.user.username }}</span>
                <span class="fw-normal post-caption">{{ post.caption }}</span>
            </p>
            <p class="post-hashtags"># {{ post.hashtags }}</p>
        </div>
    </div>
    {% empty %}
    <p class="text-center">No posts yet. Start by creating one!</p>
    {% endfor %}
</div>
Testing the Advanced Post Creation Feature
- Create a Post:
- Go to /create_post/ and upload multiple images with a caption and hashtags.
- The post should be saved and displayed on the homepage (/home/).
- Edit a Post:
- Go to /edit_post/<post_id>/ and update the caption, hashtags, or images.
- Delete a Post:
- Click the delete button to remove a post.
- Like a Post:
- Click the like button to like/unlike a post.
- Comment on a Post:
- Add a comment to a post using the comment form.
Feature 3: Comments and Likes
This feature allows users to interact with posts by liking them and adding comments. It’s tightly integrated with the Post Creation feature.
1.Like Post
Users can like or unlike a post. The like count updates dynamically.
Like Model
The Post model in posts/models.py includes a likes field:
					from django.db import models
from django.contrib.auth import get_user_model

User = get_user_model()

class Post(models.Model):
    user = models.ForeignKey(User, on_delete=models.CASCADE)
    image = models.ImageField(upload_to='posts/')
    caption = models.TextField()
    hashtags = models.CharField(max_length=255, blank=True, null=True)
    created_at = models.DateTimeField(auto_now_add=True)
    likes = models.ManyToManyField(User, related_name='liked_posts', blank=True)

    def total_likes(self):
        return self.likes.count()

    def __str__(self):
        return f"{self.user.username} - {self.caption[:20]}"
Like View
The like_post view in posts/views.py handles the like/unlike logic:

from django.http import JsonResponse
from django.shortcuts import get_object_or_404
from .models import Post

@login_required
def like_post(request, post_id):
    post = get_object_or_404(Post, id=post_id)
    if request.user in post.likes.all():
        post.likes.remove(request.user)
        liked = False
    else:
        post.likes.add(request.user)
        liked = True
    return JsonResponse({'liked': liked, 'total_likes': post.total_likes()})
Like Button in home.html
Add the like button to the post template:

<button id="like-btn-{{ post.id }}"
    class="btn {% if request.user in post.likes.all %}btn-danger{% else %}btn-outline-danger{% endif %}"
    onclick="likePost('{{ post.id }}')">
    ❤️ <span id="like-count-{{ post.id }}">{{ post.total_likes }}</span>
</button>

JavaScript for Like Functionality
Add the following JavaScript to handle the like button:

function likePost(postId) {
    fetch(`/like/${postId}/`, {
        method: 'POST',
        headers: {
            'X-CSRFToken': '{{ csrf_token }}'
        }
    })
    .then(response => response.json())
    .then(data => {
        let likeBtn = document.getElementById(`like-btn-${postId}`);
        let likeCount = document.getElementById(`like-count-${postId}`);

        if (data.liked) {
            likeBtn.classList.add('btn-danger');
            likeBtn.classList.remove('btn-outline-danger');
        } else {
            likeBtn.classList.add('btn-outline-danger');
            likeBtn.classList.remove('btn-danger');
        }
        likeCount.innerText = data.total_likes;
    });
}
Comment on a Post
Users can add comments to posts. Comments are displayed below the post.
Comment Model
The Comment model in posts/models.py:
					class Comment(models.Model):
    post = models.ForeignKey(Post, on_delete=models.CASCADE, related_name='comments')
    user = models.ForeignKey(User, on_delete=models.CASCADE)
    text = models.TextField()
    created_at = models.DateTimeField(auto_now_add=True)

    def __str__(self):
        return f"{self.user.username}: {self.text}"
Comment Form
The CommentForm in posts/forms.py:
					from django import forms
from .models import Comment

class CommentForm(forms.ModelForm):
    class Meta:
        model = Comment
        fields = ['text']
Comment View
The add_comment view in posts/views.py:
					from django.shortcuts import redirect, get_object_or_404
from .forms import CommentForm
from .models import Post

@login_required
def add_comment(request, post_id):
    post = get_object_or_404(Post, id=post_id)
    if request.method == 'POST':
        form = CommentForm(request.POST)
        if form.is_valid():
            comment = form.save(commit=False)
            comment.post = post
            comment.user = request.user
            comment.save()
    return redirect('home')
Comment Section in home.html
Add the comment section to the post template:
					<div id="comment-section-{{ post.id }}" class="collapse">
    <form method="POST" action="{% url 'add_comment' post.id %}">
        {% csrf_token %}
        <div class="input-group mb-3">
            <input type="text" name="text" class="form-control" placeholder="Add a comment..." required>
            <button class="btn btn-primary" type="submit">Post</button>
        </div>
    </form>


    <div class="comments-list">
        {% for comment in post.comments.all %}
        <div class="d-flex justify-content-between align-items-center mb-2">
            <div>
                <strong>{{ comment.user.username }}:</strong> {{ comment.text }}
            </div>
            {% if comment.user == request.user or request.user.is_superuser %}
            <a href="{% url 'delete_comment' comment.id %}" class="btn btn-sm btn-danger">Delete</a>
            {% endif %}
        </div>
        {% empty %}
        <p>No comments yet.</p>
        {% endfor %}
    </div>
</div>
- Testing Comments and Likes
- Like a Post:
- Click the like button on a post.
- Verify that the like count updates and the button changes color.
- Add a Comment:
- Type a comment in the comment box and click “Post”.
- Verify that the comment appears below the post.
- Delete a Comment:
- If you are the comment author or an admin, click the “Delete” button next to a comment.
Verify that the comment is removed
Feature 4: Dark Mode Toggle
- Dark Mode Implementation
The dark mode toggle allows users to switch between light and dark themes. This is implemented using JavaScript and CSS.
- JavaScript for Dark Mode
Add the following JavaScript to handle the dark mode toggle:
					const toggleButton = document.querySelector(".toggle-dark-mode");
const darkModeIcon = document.getElementById("darkModeIcon");
const body = document.body;
const moonIcon = "{% static 'images/moon.png' %}";  // Dark Mode Icon
const sunIcon = "{% static 'images/sun.png' %}";    // Light Mode Icon

// Check user preference from localStorage
if (localStorage.getItem("darkMode") === "enabled") {
    enableDarkMode();
}

// Add event listener to toggle dark mode
toggleButton.addEventListener("click", () => {
    if (body.classList.contains("dark-mode")) {
        disableDarkMode();
    } else {
        enableDarkMode();
    }
});

// Enable Dark Mode
function enableDarkMode() {
    body.classList.add("dark-mode");
    darkModeIcon.src = sunIcon;
    darkModeIcon.style.filter = "invert(1)"; // Apply invert filter
    localStorage.setItem("darkMode", "enabled");
}

// Disable Dark Mode
function disableDarkMode() {
    body.classList.remove("dark-mode");
    darkModeIcon.src = moonIcon;
    darkModeIcon.style.filter = "invert(0)"; // Apply invert filter
    localStorage.setItem("darkMode", "disabled");
}
3. CSS for Dark Mode
Add the following CSS to style the dark mode:

body {
    background-color: #fafafa;
    transition: background 0.3s, color 0.3s;
}

.dark-mode {
    background-color: #121212;
    color: #ffffff;
}

.dark-mode .navbar {
    background-color: #333 !important;
    color: #ffffff !important;
}

.dark-mode .navbar a,
.dark-mode .navbar button {
    color: #ffffff !important;
}

.dark-mode .modal-content {
    background-color: #333;
    color: #fff;
}

.dark-mode .modal-header {
    border-bottom: 1px solid #444;
}

.dark-mode .modal-footer {
    border-top: 1px solid #444;
}
4. Dark Mode Toggle Button
Add the dark mode toggle button to the navbar:

<button class="toggle-dark-mode">
    <img decoding="async" id="darkModeIcon" src="{% static 'images/moon.png' %}" alt="Toggle Dark Mode">
</button>
- Testing Dark Mode
- Click the dark mode toggle button to switch between light and dark themes.
The theme preference is saved in localStorage and persists across page reloads
Feature 5: Profile Editing
- Profile Editing Form
The profile editing feature allows users to update their profile picture, bio, and website.
- Profile Edit Form
Create a form for editing the profile in accounts/forms.py:
					from django import forms
from .models import Profile

class ProfileEditForm(forms.ModelForm):
    class Meta:
        model = Profile
        fields = ['profile_pic', 'bio', 'website']
- Profile Edit View
Add the profile edit view in accounts/views.py:
					from django.shortcuts import render, redirect
from .forms import ProfileEditForm
from .models import Profile

@login_required
def edit_profile(request):
    try:
        profile = request.user.profile
    except Profile.DoesNotExist:
        profile = Profile(user=request.user)
        profile.save()

    if request.method == 'POST':
        form = ProfileEditForm(request.POST, request.FILES, instance=profile)
        if form.is_valid():
            form.save()
            return redirect('profile', username=request.user.username)
    else:
        form = ProfileEditForm(instance=profile)
    return render(request, 'accounts/edit_profile.html', {'form': form})
- Profile Edit Template
Create the edit_profile.html template:
					{% load static %}

<!DOCTYPE html>
<html lang="en">
<head>
    <meta charset="UTF-8">
    <meta name="viewport" content="width=device-width, initial-scale=1.0">
    <title>Edit Profile</title>
    <link rel="stylesheet" href="https://cdn.jsdelivr.net/npm/bootstrap@5.3.0/dist/css/bootstrap.min.css">
</head>
<body>


    <nav class="navbar navbar-light bg-white border-bottom shadow-sm">
        <div class="container d-flex justify-content-between">
            <a class="navbar-brand fw-bold" href="{% url 'home' %}"><img decoding="async" style="width: 10%; margin: 10px;" src="{% static 'images/instagram.png' %}">Instagram</a>
            <div>
                <a href="{% url 'create_post' %}" class="btn btn-primary">Create Post</a>
                <a href="{% url 'logout' %}" class="btn btn-danger">Logout</a>
            </div>
        </div>
    </nav>

    <div class="container mt-5">
        <h2>Edit Profile</h2>
        <form method="POST" enctype="multipart/form-data">
            {% csrf_token %}


            <div class="mb-3">
                <label for="profile_pic" class="form-label">Profile Picture</label>
                <input type="file" class="form-control" id="profile_pic" name="profile_pic" accept="image/*" value="{{ form.profile_pic.value }}">
                {% if form.profile_pic.errors %}
                    <div class="text-danger">
                        {% for error in form.profile_pic.errors %}
                            <p>{{ error }}</p>
                        {% endfor %}
                    </div>
                {% endif %}
            </div>


            <div class="mb-3">
                <label for="bio" class="form-label">Bio</label>
                <textarea class="form-control" id="bio" name="bio" rows="3">{{ form.bio.value }}</textarea>
                {% if form.bio.errors %}
                    <div class="text-danger">
                        {% for error in form.bio.errors %}
                            <p>{{ error }}</p>
                        {% endfor %}
                    </div>
                {% endif %}
            </div>


            <div class="mb-3">
                <label for="website" class="form-label">Website</label>
                <input type="url" class="form-control" id="website" name="website" value="{{ form.website.value }}">
                {% if form.website.errors %}
                    <div class="text-danger">
                        {% for error in form.website.errors %}
                            <p>{{ error }}</p>
                        {% endfor %}
                    </div>
                {% endif %}
            </div>


            <button type="submit" class="btn btn-primary">Save Changes</button>
        </form>
    </div> <script data-no-optimize="1">window.lazyLoadOptions=Object.assign({},{threshold:300},window.lazyLoadOptions||{});!function(t,e){"object"==typeof exports&&"undefined"!=typeof module?module.exports=e():"function"==typeof define&&define.amd?define(e):(t="undefined"!=typeof globalThis?globalThis:t||self).LazyLoad=e()}(this,function(){"use strict";function e(){return(e=Object.assign||function(t){for(var e=1;e<arguments.length;e++){var n,a=arguments[e];for(n in a)Object.prototype.hasOwnProperty.call(a,n)&&(t[n]=a[n])}return t}).apply(this,arguments)}function o(t){return e({},at,t)}function l(t,e){return t.getAttribute(gt+e)}function c(t){return l(t,vt)}function s(t,e){return function(t,e,n){e=gt+e;null!==n?t.setAttribute(e,n):t.removeAttribute(e)}(t,vt,e)}function i(t){return s(t,null),0}function r(t){return null===c(t)}function u(t){return c(t)===_t}function d(t,e,n,a){t&&(void 0===a?void 0===n?t(e):t(e,n):t(e,n,a))}function f(t,e){et?t.classList.add(e):t.className+=(t.className?" ":"")+e}function _(t,e){et?t.classList.remove(e):t.className=t.className.replace(new RegExp("(^|\\s+)"+e+"(\\s+|$)")," ").replace(/^\s+/,"").replace(/\s+$/,"")}function g(t){return t.llTempImage}function v(t,e){!e||(e=e._observer)&&e.unobserve(t)}function b(t,e){t&&(t.loadingCount+=e)}function p(t,e){t&&(t.toLoadCount=e)}function n(t){for(var e,n=[],a=0;e=t.children[a];a+=1)"SOURCE"===e.tagName&&n.push(e);return n}function h(t,e){(t=t.parentNode)&&"PICTURE"===t.tagName&&n(t).forEach(e)}function a(t,e){n(t).forEach(e)}function m(t){return!!t[lt]}function E(t){return t[lt]}function I(t){return delete t[lt]}function y(e,t){var n;m(e)||(n={},t.forEach(function(t){n[t]=e.getAttribute(t)}),e[lt]=n)}function L(a,t){var o;m(a)&&(o=E(a),t.forEach(function(t){var e,n;e=a,(t=o[n=t])?e.setAttribute(n,t):e.removeAttribute(n)}))}function k(t,e,n){f(t,e.class_loading),s(t,st),n&&(b(n,1),d(e.callback_loading,t,n))}function A(t,e,n){n&&t.setAttribute(e,n)}function O(t,e){A(t,rt,l(t,e.data_sizes)),A(t,it,l(t,e.data_srcset)),A(t,ot,l(t,e.data_src))}function w(t,e,n){var a=l(t,e.data_bg_multi),o=l(t,e.data_bg_multi_hidpi);(a=nt&&o?o:a)&&(t.style.backgroundImage=a,n=n,f(t=t,(e=e).class_applied),s(t,dt),n&&(e.unobserve_completed&&v(t,e),d(e.callback_applied,t,n)))}function x(t,e){!e||0<e.loadingCount||0<e.toLoadCount||d(t.callback_finish,e)}function M(t,e,n){t.addEventListener(e,n),t.llEvLisnrs[e]=n}function N(t){return!!t.llEvLisnrs}function z(t){if(N(t)){var e,n,a=t.llEvLisnrs;for(e in a){var o=a[e];n=e,o=o,t.removeEventListener(n,o)}delete t.llEvLisnrs}}function C(t,e,n){var a;delete t.llTempImage,b(n,-1),(a=n)&&--a.toLoadCount,_(t,e.class_loading),e.unobserve_completed&&v(t,n)}function R(i,r,c){var l=g(i)||i;N(l)||function(t,e,n){N(t)||(t.llEvLisnrs={});var a="VIDEO"===t.tagName?"loadeddata":"load";M(t,a,e),M(t,"error",n)}(l,function(t){var e,n,a,o;n=r,a=c,o=u(e=i),C(e,n,a),f(e,n.class_loaded),s(e,ut),d(n.callback_loaded,e,a),o||x(n,a),z(l)},function(t){var e,n,a,o;n=r,a=c,o=u(e=i),C(e,n,a),f(e,n.class_error),s(e,ft),d(n.callback_error,e,a),o||x(n,a),z(l)})}function T(t,e,n){var a,o,i,r,c;t.llTempImage=document.createElement("IMG"),R(t,e,n),m(c=t)||(c[lt]={backgroundImage:c.style.backgroundImage}),i=n,r=l(a=t,(o=e).data_bg),c=l(a,o.data_bg_hidpi),(r=nt&&c?c:r)&&(a.style.backgroundImage='url("'.concat(r,'")'),g(a).setAttribute(ot,r),k(a,o,i)),w(t,e,n)}function G(t,e,n){var a;R(t,e,n),a=e,e=n,(t=Et[(n=t).tagName])&&(t(n,a),k(n,a,e))}function D(t,e,n){var a;a=t,(-1<It.indexOf(a.tagName)?G:T)(t,e,n)}function S(t,e,n){var a;t.setAttribute("loading","lazy"),R(t,e,n),a=e,(e=Et[(n=t).tagName])&&e(n,a),s(t,_t)}function V(t){t.removeAttribute(ot),t.removeAttribute(it),t.removeAttribute(rt)}function j(t){h(t,function(t){L(t,mt)}),L(t,mt)}function F(t){var e;(e=yt[t.tagName])?e(t):m(e=t)&&(t=E(e),e.style.backgroundImage=t.backgroundImage)}function P(t,e){var n;F(t),n=e,r(e=t)||u(e)||(_(e,n.class_entered),_(e,n.class_exited),_(e,n.class_applied),_(e,n.class_loading),_(e,n.class_loaded),_(e,n.class_error)),i(t),I(t)}function U(t,e,n,a){var o;n.cancel_on_exit&&(c(t)!==st||"IMG"===t.tagName&&(z(t),h(o=t,function(t){V(t)}),V(o),j(t),_(t,n.class_loading),b(a,-1),i(t),d(n.callback_cancel,t,e,a)))}function $(t,e,n,a){var o,i,r=(i=t,0<=bt.indexOf(c(i)));s(t,"entered"),f(t,n.class_entered),_(t,n.class_exited),o=t,i=a,n.unobserve_entered&&v(o,i),d(n.callback_enter,t,e,a),r||D(t,n,a)}function q(t){return t.use_native&&"loading"in HTMLImageElement.prototype}function H(t,o,i){t.forEach(function(t){return(a=t).isIntersecting||0<a.intersectionRatio?$(t.target,t,o,i):(e=t.target,n=t,a=o,t=i,void(r(e)||(f(e,a.class_exited),U(e,n,a,t),d(a.callback_exit,e,n,t))));var e,n,a})}function B(e,n){var t;tt&&!q(e)&&(n._observer=new IntersectionObserver(function(t){H(t,e,n)},{root:(t=e).container===document?null:t.container,rootMargin:t.thresholds||t.threshold+"px"}))}function J(t){return Array.prototype.slice.call(t)}function K(t){return t.container.querySelectorAll(t.elements_selector)}function Q(t){return c(t)===ft}function W(t,e){return e=t||K(e),J(e).filter(r)}function X(e,t){var n;(n=K(e),J(n).filter(Q)).forEach(function(t){_(t,e.class_error),i(t)}),t.update()}function t(t,e){var n,a,t=o(t);this._settings=t,this.loadingCount=0,B(t,this),n=t,a=this,Y&&window.addEventListener("online",function(){X(n,a)}),this.update(e)}var Y="undefined"!=typeof window,Z=Y&&!("onscroll"in window)||"undefined"!=typeof navigator&&/(gle|ing|ro)bot|crawl|spider/i.test(navigator.userAgent),tt=Y&&"IntersectionObserver"in window,et=Y&&"classList"in document.createElement("p"),nt=Y&&1<window.devicePixelRatio,at={elements_selector:".lazy",container:Z||Y?document:null,threshold:300,thresholds:null,data_src:"src",data_srcset:"srcset",data_sizes:"sizes",data_bg:"bg",data_bg_hidpi:"bg-hidpi",data_bg_multi:"bg-multi",data_bg_multi_hidpi:"bg-multi-hidpi",data_poster:"poster",class_applied:"applied",class_loading:"litespeed-loading",class_loaded:"litespeed-loaded",class_error:"error",class_entered:"entered",class_exited:"exited",unobserve_completed:!0,unobserve_entered:!1,cancel_on_exit:!0,callback_enter:null,callback_exit:null,callback_applied:null,callback_loading:null,callback_loaded:null,callback_error:null,callback_finish:null,callback_cancel:null,use_native:!1},ot="src",it="srcset",rt="sizes",ct="poster",lt="llOriginalAttrs",st="loading",ut="loaded",dt="applied",ft="error",_t="native",gt="data-",vt="ll-status",bt=[st,ut,dt,ft],pt=[ot],ht=[ot,ct],mt=[ot,it,rt],Et={IMG:function(t,e){h(t,function(t){y(t,mt),O(t,e)}),y(t,mt),O(t,e)},IFRAME:function(t,e){y(t,pt),A(t,ot,l(t,e.data_src))},VIDEO:function(t,e){a(t,function(t){y(t,pt),A(t,ot,l(t,e.data_src))}),y(t,ht),A(t,ct,l(t,e.data_poster)),A(t,ot,l(t,e.data_src)),t.load()}},It=["IMG","IFRAME","VIDEO"],yt={IMG:j,IFRAME:function(t){L(t,pt)},VIDEO:function(t){a(t,function(t){L(t,pt)}),L(t,ht),t.load()}},Lt=["IMG","IFRAME","VIDEO"];return t.prototype={update:function(t){var e,n,a,o=this._settings,i=W(t,o);{if(p(this,i.length),!Z&&tt)return q(o)?(e=o,n=this,i.forEach(function(t){-1!==Lt.indexOf(t.tagName)&&S(t,e,n)}),void p(n,0)):(t=this._observer,o=i,t.disconnect(),a=t,void o.forEach(function(t){a.observe(t)}));this.loadAll(i)}},destroy:function(){this._observer&&this._observer.disconnect(),K(this._settings).forEach(function(t){I(t)}),delete this._observer,delete this._settings,delete this.loadingCount,delete this.toLoadCount},loadAll:function(t){var e=this,n=this._settings;W(t,n).forEach(function(t){v(t,e),D(t,n,e)})},restoreAll:function(){var e=this._settings;K(e).forEach(function(t){P(t,e)})}},t.load=function(t,e){e=o(e);D(t,e)},t.resetStatus=function(t){i(t)},t}),function(t,e){"use strict";function n(){e.body.classList.add("litespeed_lazyloaded")}function a(){console.log("[LiteSpeed] Start Lazy Load"),o=new LazyLoad(Object.assign({},t.lazyLoadOptions||{},{elements_selector:"[data-lazyloaded]",callback_finish:n})),i=function(){o.update()},t.MutationObserver&&new MutationObserver(i).observe(e.documentElement,{childList:!0,subtree:!0,attributes:!0})}var o,i;t.addEventListener?t.addEventListener("load",a,!1):t.attachEvent("onload",a)}(window,document);</script><script data-no-optimize="1">window.litespeed_ui_events=window.litespeed_ui_events||["mouseover","click","keydown","wheel","touchmove","touchstart"];var urlCreator=window.URL||window.webkitURL;function litespeed_load_delayed_js_force(){console.log("[LiteSpeed] Start Load JS Delayed"),litespeed_ui_events.forEach(e=>{window.removeEventListener(e,litespeed_load_delayed_js_force,{passive:!0})}),document.querySelectorAll("iframe[data-litespeed-src]").forEach(e=>{e.setAttribute("src",e.getAttribute("data-litespeed-src"))}),"loading"==document.readyState?window.addEventListener("DOMContentLoaded",litespeed_load_delayed_js):litespeed_load_delayed_js()}litespeed_ui_events.forEach(e=>{window.addEventListener(e,litespeed_load_delayed_js_force,{passive:!0})});async function litespeed_load_delayed_js(){let t=[];for(var d in document.querySelectorAll('script[type="litespeed/javascript"]').forEach(e=>{t.push(e)}),t)await new Promise(e=>litespeed_load_one(t[d],e));document.dispatchEvent(new Event("DOMContentLiteSpeedLoaded")),window.dispatchEvent(new Event("DOMContentLiteSpeedLoaded"))}function litespeed_load_one(t,e){console.log("[LiteSpeed] Load ",t);var d=document.createElement("script");d.addEventListener("load",e),d.addEventListener("error",e),t.getAttributeNames().forEach(e=>{"type"!=e&&d.setAttribute("data-src"==e?"src":e,t.getAttribute(e))});let a=!(d.type="text/javascript");!d.src&&t.textContent&&(d.src=litespeed_inline2src(t.textContent),a=!0),t.after(d),t.remove(),a&&e()}function litespeed_inline2src(t){try{var d=urlCreator.createObjectURL(new Blob([t.replace(/^(?:<!--)?(.*?)(?:-->)?$/gm,"$1")],{type:"text/javascript"}))}catch(e){d="data:text/javascript;base64,"+btoa(t.replace(/^(?:<!--)?(.*?)(?:-->)?$/gm,"$1"))}return d}</script><script data-optimized="1" type="litespeed/javascript" data-src="https://techamplifiers.com/wp-content/litespeed/js/d0ff985d04bb2d8f427563a6e257b8f6.js?ver=9a9b4"></script></body>
</html>
- URL Routing
Add the URL for profile editing in accounts/urls.py:
					from django.urls import path
from .views import edit_profile

urlpatterns = [
    path('edit_profile/', edit_profile, name='edit_profile'),
]
- Testing Profile Editing
- Go to /edit_profile/.
- Update the profile picture, bio, or website.
- Save the changes and verify that the profile is updated.
Feature 6: Followers and Following
Key Functionalities
- Follow/Unfollow: Users can follow or unfollow other users.
- Followers List: Users can see who is following them.
- Following List: Users can see who they are following.
- Profile Visits: Users can click on a follower/following username to visit their profile.
- Count Updates: The follower and following counts update dynamically when a user follows/unfollows someone.
- Models for Followers and Following
The Follow model in posts/models.py handles the relationship between users:
					from django.db import models
from django.contrib.auth import get_user_model

User = get_user_model()

class Follow(models.Model):
    follower = models.ForeignKey(User, on_delete=models.CASCADE, related_name='following_relations')
    following = models.ForeignKey(User, on_delete=models.CASCADE, related_name='follower_relations')
    timestamp = models.DateTimeField(auto_now_add=True)

    class Meta:
        unique_together = ('follower', 'following')

    def __str__(self):
        return f"{self.follower.username} follows {self.following.username}"
- follower: The user who is following another user.
- following: The user being followed.
- timestamp: The time when the follow relationship was created.
- Follow/Unfollow View
The follow_unfollow view in posts/views.py handles the follow/unfollow logic:
					from django.shortcuts import redirect, get_object_or_404
from django.contrib.auth.decorators import login_required
from .models import Follow

@login_required
def follow_unfollow(request, username):
    user_to_follow = get_object_or_404(User, username=username)

    if user_to_follow == request.user:
        return redirect("profile", username=username)  # Prevent self-follow

    # Check if the current user already follows the target user
    existing_follow = Follow.objects.filter(follower=request.user, following=user_to_follow)

    if existing_follow.exists():
        existing_follow.delete()  # Unfollow
    else:
        Follow.objects.create(follower=request.user, following=user_to_follow)  # Follow

    return redirect("profile", username=username)
- Followers and Following Modals
The profile.html template includes modals to display the followers and following lists. Here’s the relevant code:
<div class="modal fade" id="followersModal" tabindex="-1" aria-hidden="true">
    <div class="modal-dialog">
        <div class="modal-content">
            <div class="modal-header">
                <h5 class="modal-title">Followers</h5>
                <button type="button" class="btn-close" data-bs-dismiss="modal"></button>
            </div>
            <div class="modal-body">
                {% if user.follower_relations.all %}
                <ul class="list-group">
                    {% for follow in user.follower_relations.all %}
                    <li class="list-group-item d-flex align-items-center">
                        <img decoding="async" src="{% if follow.follower.profile.profile_pic %}{{ follow.follower.profile.profile_pic.url }}{% else %}{% static 'images/default_profile.jpg' %}{% endif %}"
                            alt="Profile Pic" class="rounded-circle me-2"
                            style="width: 40px; height: 40px; object-fit: cover;">
                        <a href="{% url 'profile' follow.follower.username %}"
                            class="text-decoration-none text-dark fw-bold hover-effect">
                            {{ follow.follower.username }}
                        </a>
                    </li>
                    {% endfor %}
                </ul>
                {% else %}
                <p class="text-center text-muted">No followers yet.</p>
                {% endif %}
            </div>
        </div>
    </div>
</div>


<div class="modal fade" id="followingModal" tabindex="-1" aria-hidden="true">
    <div class="modal-dialog">
        <div class="modal-content">
            <div class="modal-header">
                <h5 class="modal-title">Following</h5>
                <button type="button" class="btn-close" data-bs-dismiss="modal"></button>
            </div>
            <div class="modal-body">
                {% if user.following_relations.all %}
                <ul class="list-group">
                    {% for follow in user.following_relations.all %}
                    <li class="list-group-item d-flex align-items-center">
                        <img decoding="async" src="{{ follow.following.profile.profile_pic.url }}" alt="Profile Pic"
                            class="rounded-circle me-2" style="width: 40px; height: 40px; object-fit: cover;">
                        <a href="{% url 'profile' follow.following.username %}"
                            class="text-decoration-none text-dark fw-bold hover-effect">
                            {{ follow.following.username }}
                        </a>
                    </li>
                    {% endfor %}
                </ul>
                {% else %}
                <p class="text-center text-muted">Not following anyone yet.</p>
                {% endif %}
            </div>
        </div>
    </div>
</div>
- Profile Page Integration
The profile.html template includes the follower and following counts, along with buttons to trigger the modals:
<div class="container profile-header">
    <img decoding="async" src="{% if profile.profile_pic %}{{ profile.profile_pic.url }}{% else %}{% static 'images/default_profile.png' %}{% endif %}"
        class="profile-img" alt="{{ user.username }}'s Profile Picture">

    <div class="profile-info">
        <h2>{{ user.username }}</h2>
        <div class="profile-stats">
            <div><span>{{ posts.count }}</span> Posts</div>
            <div>
                <a href="#" data-bs-toggle="modal" data-bs-target="#followersModal"
                    class="text-decoration-none fw-bold hover-effect">
                    <p class="mb-0">{{ user.follower_relations.count }} Followers</p>
                </a>
            </div>
            <div>
                <a href="#" data-bs-toggle="modal" data-bs-target="#followingModal"
                    class="text-decoration-none fw-bold hover-effect">
                    <p class="mb-0">{{ user.following_relations.count }} Following</p>
                </a>
            </div>
        </div>
        <p style="margin-bottom: 0;">Joined: {{ user.date_joined|date:"F Y" }}</p>
        <p style="margin-bottom: 0;">{{ profile.bio }}</p>
        <a href="{{ profile.website }}" target="_blank" style="margin-bottom: 0;">{{ profile.website }}</a>


        <div style="display: flex; gap: 10px;">
            {% if request.user != user %}
            <form action="{% url 'follow_unfollow' user.username %}" method="POST">
                {% csrf_token %}
                {% if is_following %}
                <button class="btn btn-danger btn-sm">Unfollow</button>
                {% else %}
                <button class="btn btn-outline-primary btn-sm">Follow</button>
                {% endif %}
            </form>
            {% else %}
            <a href="{% url 'edit_profile' %}" class="btn btn-primary btn-sm">Edit Profile</a>
            {% endif %}
        </div>
    </div>
</div>
- Testing the Feature
- Follow/Unfollow:
- Go to another user’s profile and click the “Follow” button.
- The follower count should increase, and the button should change to “Unfollow”.
- Click “Unfollow” to revert the action.
- Followers and Following Lists:
- Click on the “Followers” or “Following” count to open the modal.
- Verify that the lists are displayed correctly.
- Click on a username to visit their profile.
- Dynamic Count Updates:
- Follow/unfollow a user and verify that the counts update dynamically.
Feature 7: Reels
- Key Functionalities
- Upload Reels: Users can upload short videos (reels).
- View Reels: Users can view reels in a dedicated feed.
- Like Reels: Users can like or unlike reels.
- Comment on Reels: Users can add comments to reels.
- Reel Model
The Reel model in posts/models.py:
					class Reel(models.Model):
    user = models.ForeignKey(User, on_delete=models.CASCADE, related_name="reels")
    video = models.FileField(upload_to="reels/")
    caption = models.TextField(blank=True, null=True)
    hashtags = models.CharField(max_length=255, blank=True, null=True)
    created_at = models.DateTimeField(auto_now_add=True)
    likes = models.ManyToManyField(User, related_name="liked_reels", blank=True)

    def total_likes(self):
        return self.likes.count()

    def __str__(self):
        return f"Reel by {self.user.username}"
- Reel Views
Add views for reels in posts/views.py:
					from django.shortcuts import render, redirect
from .models import Reel
from .forms import ReelForm

@login_required
def create_reel(request):
    if request.method == "POST":
        form = ReelForm(request.POST, request.FILES)
        if form.is_valid():
            reel = form.save(commit=False)
            reel.user = request.user
            reel.save()
            return redirect("reels_feed")
    else:
        form = ReelForm()
    return render(request, "posts/create_reel.html", {"form": form})

@login_required
def reels_feed(request):
    reels = Reel.objects.all().order_by('-created_at')
    return render(request, "posts/reels.html", {"reels": reels})

@login_required
def like_reel(request, reel_id):
    reel = get_object_or_404(Reel, id=reel_id)
    if request.user in reel.likes.all():
        reel.likes.remove(request.user)
        liked = False
    else:
        reel.likes.add(request.user)
        liked = True
    return JsonResponse({"liked": liked, "likes_count": reel.likes.count()})
- Reel Templates
- create_reel.html: Template for uploading reels.
- reels.html: Template for displaying reels.
Templates/posts/create_reel.html:
					<div class="container">
        <h2>Create a Reel</h2>

        <form method="POST" enctype="multipart/form-data">
            {% csrf_token %}

            <div class="form-group">
                <label for="id_video" class="form-label">Upload Video</label>
                <input type="file" class="form-control" name="video" accept="video/*" required>
            </div>

            <div class="form-group">
                <label for="id_caption" class="form-label">Caption</label>
                <textarea class="form-control" name="caption" rows="3" placeholder="Write a caption..." required></textarea>
            </div>

            <div class="form-group">
                <label for="id_hashtags" class="form-label">Hashtags</label>
                <input type="text" class="form-control" name="hashtags" placeholder="Enter hashtags, separated by spaces or commas">
            </div>

            <button type="submit" class="btn btn-primary w-100">Upload Reel</button>
        </form>

        <div class="back-button">
            <a href="{% url 'reels_feed' %}" class="btn btn-secondary">Back to Reels</a>
        </div>
    </div>
Templates/posts/reels.html:
<body>
<!– Navbar –>
<nav class=”navbar navbar-dark”>
<div class=”container-fluid d-flex justify-content-between”>
<a class=”navbar-brand” href=”{% url ‘home’ %}”>🏠 Home</a>
<a class=”navbar-brand” href=”#”>📸 Reels</a>
</div>
</nav>
<!– Reels –>
<div class=”reels-container”>
{% for reel in reels %}
<div class=”reel” id=”reel-{{ forloop.counter0 }}”>
<video class=”reel-video” muted loop>
<source src=”{{ reel.video.url }}” type=”video/mp4″>
Your browser does not support the video tag.
</video>
<div class=”controls”>
<button class=”like-button” data-reel-id=”{{ reel.id }}”>
❤️ <span id=”like-count-{{ reel.id }}”>{{ reel.likes.count }}</span>
</button>
<button class=”comment-button” data-reel-id=”{{ reel.id }}”>💬</button>
<button class=”delete-button” data-reel-id=”{{ reel.id }}”>🗑️</button>
</div>
<div class=”controls_user” style=”color: rgb(16, 15, 15);”>
<a href=”{% url ‘profile’ username=reel.user.username %}”
style=”text-decoration: none; color: black; font-weight: 800; “>
<div style=”display: flex; align-items: center; justify-content: space-evenly; “>
<img class=”profile-img” src=”{{ reel.user.profile.profile_pic.url }}” alt=”Profile Picture”>
<p style=”font-size: 1.3rem; margin-left: 5px;”>{{ reel.user.username }}</p>
</div>
</a>
<p style=”font-size: 1.1rem; font-weight: 600;”>{{ reel.caption }}</p>
<p> # {{ reel.hashtags }}</p>
</div>
</div>
{% empty %}
<p class=”text-center”>No reels uploaded yet.</p>
{% endfor %}
</div>
<!– Comment Section –>
<div id=”comment-section” class=”comment-section”>
<h4>Comments</h4>
<ul id=”comments-list”></ul>
<form id=”comment-form”>
{% csrf_token %}
<input type=”text” id=”comment-input” placeholder=”Add a comment…” required>
<button type=”submit” class=”btn btn-primary”>Post</button>
</form>
</div>
<script>
document.addEventListener(“DOMContentLoaded”, function () {
const reels = document.querySelectorAll(“.reel”);
const videos = document.querySelectorAll(“.reel-video”);
const commentSection = document.getElementById(“comment-section”);
let currentIndex = 0;
function showReel(index) {
reels.forEach((reel, i) => {
if (i === index) {
reel.style.transform = “translateY(0)”;
reel.style.opacity = “1”;
videos[i].play();
} else if (i < index) {
reel.style.transform = “translateY(-100%)”;
reel.style.opacity = “0”;
videos[i].pause();
} else {
reel.style.transform = “translateY(100%)”;
reel.style.opacity = “0”;
videos[i].pause();
}
});
}
// Initialize first reel
showReel(currentIndex);
document.addEventListener(“keydown”, function (event) {
if (event.key === “ArrowDown”) {
currentIndex = (currentIndex + 1) % reels.length;
showReel(currentIndex);
} else if (event.key === “ArrowUp”) {
currentIndex = (currentIndex – 1 + reels.length) % reels.length;
showReel(currentIndex);
}
});
document.addEventListener(“wheel”, function (event) {
if (event.deltaY > 0) {
currentIndex = (currentIndex + 1) % reels.length;
} else if (event.deltaY < 0) {
currentIndex = (currentIndex – 1 + reels.length) % reels.length;
}
showReel(currentIndex);
});
// Auto-play next reel when video ends
videos.forEach((video, index) => {
video.addEventListener(“ended”, () => {
currentIndex = (currentIndex + 1) % reels.length;
showReel(currentIndex);
});
});
// LIKE BUTTON FUNCTIONALITY
document.querySelectorAll(“.like-button”).forEach(button => {
button.addEventListener(“click”, function () {
let reelId = this.dataset.reelId;
let likeCountSpan = document.querySelector(`#like-count-${reelId}`);
this.classList.add(“liked”);
fetch(`/reel/${reelId}/like/`, {
method: “POST”,
headers: {
“X-CSRFToken”: getCSRFToken(),
“Content-Type”: “application/json”
},
})
.then(response => response.json())
.then(data => {
likeCountSpan.innerText = data.likes_count;
})
.catch(error => console.error(“Error:”, error));
});
});
// COMMENT BUTTON FUNCTIONALITY
document.querySelectorAll(“.comment-button”).forEach(button => {
button.addEventListener(“click”, function () {
let reelId = this.dataset.reelId;
commentSection.classList.add(“active”);
commentSection.setAttribute(“data-reel-id”, reelId);
loadComments(reelId);
});
});
document.getElementById(“comment-form”).addEventListener(“submit”, function (event) {
event.preventDefault();
let commentInput = document.getElementById(“comment-input”);
let reelId = commentSection.getAttribute(“data-reel-id”);
fetch(`/reel/${reelId}/comment/`, {
method: “POST”,
headers: {
“X-CSRFToken”: getCSRFToken(),
“Content-Type”: “application/json”
},
body: JSON.stringify({ comment: commentInput.value })
})
.then(response => response.json())
.then(data => {
commentInput.value = “”;
loadComments(reelId);
});
});
function getCSRFToken() {
return document.cookie.split(“; “).find(row => row.startsWith(“csrftoken=”))?.split(“=”)[1];
}
});
// delete reel
document.querySelectorAll(“.delete-button”).forEach(button => {
button.addEventListener(“click”, function () {
let reelId = this.dataset.reelId;
if (confirm(“Are you sure you want to delete this reel?”)) {
fetch(`/reel/${reelId}/delete/`, {
method: “POST”,
headers: {
“X-CSRFToken”: getCSRFToken(),
“Content-Type”: “application/json”
}
})
.then(response => {
if (!response.ok) {
return response.text().then(text => { throw new Error(text) });
}
return response.json();
})
.then(data => {
if (data.success) {
alert(“Reel deleted successfully.”);
window.location.reload(); // ✅ Reload page after deletion
} else {
alert(`Failed to delete the reel: ${data.error}`);
}
})
.catch(error => alert(“you can’t delete these reel as you are not the owner of the reel”, error));
}
});
});
function getCSRFToken() {
return document.cookie.split(“; “).find(row => row.startsWith(“csrftoken=”))?.split(“=”)[1];
}
</script>
</body>
Feature 8: Messaging
- Key Functionalities
- Real-Time Chat: Users can send and receive messages in real-time.
- Chat History: Users can view their chat history with other users.
- Message Model
The Message model in posts/models.py:
					class Message(models.Model):
    sender = models.ForeignKey(User, related_name='sent_messages', on_delete=models.CASCADE)
    receiver = models.ForeignKey(User, related_name='received_messages', on_delete=models.CASCADE)
    message = models.TextField()
    timestamp = models.DateTimeField(auto_now_add=True)
    is_read = models.BooleanField(default=False)

    def __str__(self):
        return f"From {self.sender.username} to {self.receiver.username}: {self.message[:20]}"
- Messaging Views
Add views for messaging in posts/views.py:
					from django.shortcuts import render, redirect
from .models import Message

@login_required
def chatbox(request):
    user_id = request.GET.get('user')
    selected_user = User.objects.filter(id=user_id).first() if user_id else None

    if request.method == 'POST':
        message_content = request.POST.get('message')
        if message_content and selected_user:
            Message.objects.create(
                sender=request.user,
                receiver=selected_user,
                message=message_content,
            )
            return redirect(f'/chatbox/?user={user_id}')

    following_users = request.user.following_relations.all().values_list('following', flat=True)
    users_to_chat = User.objects.filter(id__in=following_users)

    messages = Message.objects.filter(
        sender__in=[request.user, selected_user],
        receiver__in=[request.user, selected_user]
    ).order_by('timestamp')

    return render(request, 'posts/chatbox.html', {
        'users_to_chat': users_to_chat,
        'selected_user': selected_user,
        'messages': messages
    })
- Messaging Template
Here’s an example of chatbox.html:
					<body>
    {% load static %}


    <nav class="navbar navbar-light border-bottom shadow-sm">
        <div class="container d-flex justify-content-between">
            <a class="navbar-brand fw-bold" href="{% url 'home' %}">
                <img decoding="async" style="width: 10%; margin: 10px;" src="{% static 'images/instagram.png' %}">Instagram
            </a>
            <div>

                <button class="toggle-dark-mode">
                    <img decoding="async" id="darkModeIcon" src="{% static 'images/moon.png' %}" alt="Toggle Dark Mode">
                </button>
                <a href="{% url 'create_post' %}" class="btn btn-primary">Create Post</a>
                <a href="{% url 'profile' request.user.username %}" class="btn btn-outline-dark">Profile</a>
                <a class="btn btn-outline-dark" href="{% url 'create_reel' %}">Create Reel</a>
                <a class="btn btn-outline-dark" href="{% url 'reels_feed' %}">Reels</a>
                <a href="{% url 'logout' %}" class="btn btn-danger">Logout</a>
                <a href="{% url 'chatbox' %}" class="btn btn-primary">Chatbox</a>
            </div>
        </div>
    </nav>


    <div class="chat-container">
        <div class="row">

            <div class="col-md-3 user-list">
                <h4>Chats</h4>
                <ul>
                    {% for user in users_to_chat %}
                    <li>
                        <a href="?user={{ user.id }}">
                            <img decoding="async" src="{% if user.profile.profile_pic %}{{ user.profile.profile_pic.url }}{% else %}{% static 'images/default_profile.jpg' %}{% endif %}"
                                alt="{{ user.username }}">
                            {{ user.username }}
                        </a>
                    </li>
                    {% endfor %}
                </ul>
            </div>


            <div class="col-md-9">
                {% if selected_user %}
                <h4 class="p-3">Chat with {{ selected_user.username }}</h4>
                <div class="chat-window">
                    {% for message in messages %}
                    <div class="message-container {% if message.sender == request.user %}sent{% else %}received{% endif %}">
                        <div class="message">
                            <strong>{{ message.sender.username }}:</strong>
                            <p>{{ message.message }}</p>
                            <small>{{ message.timestamp }}</small>
                            {% if message.sender == request.user %}
                            <form method="POST" action="{% url 'delete_message' message.id %}" style="display:inline;">
                                {% csrf_token %}
                                <button style="background-color: #007bff; border-color: #007bff;" type="submit" >🗑️</button>
                            </form>
                            {% endif %}
                        </div>
                    </div>
                    {% endfor %}
                </div>


                <form method="POST" class="message-form">
                    {% csrf_token %}
                    <textarea name="message" rows="3" placeholder="Type your message..." required></textarea>
                    <button type="submit">Send</button>
                </form>
                {% else %}
                <p class="p-3">Select a user to start chatting.</p>
                {% endif %}
            </div>
        </div>
    </div>

     <script type="litespeed/javascript" data-src="https://cdn.jsdelivr.net/npm/bootstrap@5.3.0/dist/js/bootstrap.bundle.min.js"></script> <script data-no-optimize="1">window.lazyLoadOptions=Object.assign({},{threshold:300},window.lazyLoadOptions||{});!function(t,e){"object"==typeof exports&&"undefined"!=typeof module?module.exports=e():"function"==typeof define&&define.amd?define(e):(t="undefined"!=typeof globalThis?globalThis:t||self).LazyLoad=e()}(this,function(){"use strict";function e(){return(e=Object.assign||function(t){for(var e=1;e<arguments.length;e++){var n,a=arguments[e];for(n in a)Object.prototype.hasOwnProperty.call(a,n)&&(t[n]=a[n])}return t}).apply(this,arguments)}function o(t){return e({},at,t)}function l(t,e){return t.getAttribute(gt+e)}function c(t){return l(t,vt)}function s(t,e){return function(t,e,n){e=gt+e;null!==n?t.setAttribute(e,n):t.removeAttribute(e)}(t,vt,e)}function i(t){return s(t,null),0}function r(t){return null===c(t)}function u(t){return c(t)===_t}function d(t,e,n,a){t&&(void 0===a?void 0===n?t(e):t(e,n):t(e,n,a))}function f(t,e){et?t.classList.add(e):t.className+=(t.className?" ":"")+e}function _(t,e){et?t.classList.remove(e):t.className=t.className.replace(new RegExp("(^|\\s+)"+e+"(\\s+|$)")," ").replace(/^\s+/,"").replace(/\s+$/,"")}function g(t){return t.llTempImage}function v(t,e){!e||(e=e._observer)&&e.unobserve(t)}function b(t,e){t&&(t.loadingCount+=e)}function p(t,e){t&&(t.toLoadCount=e)}function n(t){for(var e,n=[],a=0;e=t.children[a];a+=1)"SOURCE"===e.tagName&&n.push(e);return n}function h(t,e){(t=t.parentNode)&&"PICTURE"===t.tagName&&n(t).forEach(e)}function a(t,e){n(t).forEach(e)}function m(t){return!!t[lt]}function E(t){return t[lt]}function I(t){return delete t[lt]}function y(e,t){var n;m(e)||(n={},t.forEach(function(t){n[t]=e.getAttribute(t)}),e[lt]=n)}function L(a,t){var o;m(a)&&(o=E(a),t.forEach(function(t){var e,n;e=a,(t=o[n=t])?e.setAttribute(n,t):e.removeAttribute(n)}))}function k(t,e,n){f(t,e.class_loading),s(t,st),n&&(b(n,1),d(e.callback_loading,t,n))}function A(t,e,n){n&&t.setAttribute(e,n)}function O(t,e){A(t,rt,l(t,e.data_sizes)),A(t,it,l(t,e.data_srcset)),A(t,ot,l(t,e.data_src))}function w(t,e,n){var a=l(t,e.data_bg_multi),o=l(t,e.data_bg_multi_hidpi);(a=nt&&o?o:a)&&(t.style.backgroundImage=a,n=n,f(t=t,(e=e).class_applied),s(t,dt),n&&(e.unobserve_completed&&v(t,e),d(e.callback_applied,t,n)))}function x(t,e){!e||0<e.loadingCount||0<e.toLoadCount||d(t.callback_finish,e)}function M(t,e,n){t.addEventListener(e,n),t.llEvLisnrs[e]=n}function N(t){return!!t.llEvLisnrs}function z(t){if(N(t)){var e,n,a=t.llEvLisnrs;for(e in a){var o=a[e];n=e,o=o,t.removeEventListener(n,o)}delete t.llEvLisnrs}}function C(t,e,n){var a;delete t.llTempImage,b(n,-1),(a=n)&&--a.toLoadCount,_(t,e.class_loading),e.unobserve_completed&&v(t,n)}function R(i,r,c){var l=g(i)||i;N(l)||function(t,e,n){N(t)||(t.llEvLisnrs={});var a="VIDEO"===t.tagName?"loadeddata":"load";M(t,a,e),M(t,"error",n)}(l,function(t){var e,n,a,o;n=r,a=c,o=u(e=i),C(e,n,a),f(e,n.class_loaded),s(e,ut),d(n.callback_loaded,e,a),o||x(n,a),z(l)},function(t){var e,n,a,o;n=r,a=c,o=u(e=i),C(e,n,a),f(e,n.class_error),s(e,ft),d(n.callback_error,e,a),o||x(n,a),z(l)})}function T(t,e,n){var a,o,i,r,c;t.llTempImage=document.createElement("IMG"),R(t,e,n),m(c=t)||(c[lt]={backgroundImage:c.style.backgroundImage}),i=n,r=l(a=t,(o=e).data_bg),c=l(a,o.data_bg_hidpi),(r=nt&&c?c:r)&&(a.style.backgroundImage='url("'.concat(r,'")'),g(a).setAttribute(ot,r),k(a,o,i)),w(t,e,n)}function G(t,e,n){var a;R(t,e,n),a=e,e=n,(t=Et[(n=t).tagName])&&(t(n,a),k(n,a,e))}function D(t,e,n){var a;a=t,(-1<It.indexOf(a.tagName)?G:T)(t,e,n)}function S(t,e,n){var a;t.setAttribute("loading","lazy"),R(t,e,n),a=e,(e=Et[(n=t).tagName])&&e(n,a),s(t,_t)}function V(t){t.removeAttribute(ot),t.removeAttribute(it),t.removeAttribute(rt)}function j(t){h(t,function(t){L(t,mt)}),L(t,mt)}function F(t){var e;(e=yt[t.tagName])?e(t):m(e=t)&&(t=E(e),e.style.backgroundImage=t.backgroundImage)}function P(t,e){var n;F(t),n=e,r(e=t)||u(e)||(_(e,n.class_entered),_(e,n.class_exited),_(e,n.class_applied),_(e,n.class_loading),_(e,n.class_loaded),_(e,n.class_error)),i(t),I(t)}function U(t,e,n,a){var o;n.cancel_on_exit&&(c(t)!==st||"IMG"===t.tagName&&(z(t),h(o=t,function(t){V(t)}),V(o),j(t),_(t,n.class_loading),b(a,-1),i(t),d(n.callback_cancel,t,e,a)))}function $(t,e,n,a){var o,i,r=(i=t,0<=bt.indexOf(c(i)));s(t,"entered"),f(t,n.class_entered),_(t,n.class_exited),o=t,i=a,n.unobserve_entered&&v(o,i),d(n.callback_enter,t,e,a),r||D(t,n,a)}function q(t){return t.use_native&&"loading"in HTMLImageElement.prototype}function H(t,o,i){t.forEach(function(t){return(a=t).isIntersecting||0<a.intersectionRatio?$(t.target,t,o,i):(e=t.target,n=t,a=o,t=i,void(r(e)||(f(e,a.class_exited),U(e,n,a,t),d(a.callback_exit,e,n,t))));var e,n,a})}function B(e,n){var t;tt&&!q(e)&&(n._observer=new IntersectionObserver(function(t){H(t,e,n)},{root:(t=e).container===document?null:t.container,rootMargin:t.thresholds||t.threshold+"px"}))}function J(t){return Array.prototype.slice.call(t)}function K(t){return t.container.querySelectorAll(t.elements_selector)}function Q(t){return c(t)===ft}function W(t,e){return e=t||K(e),J(e).filter(r)}function X(e,t){var n;(n=K(e),J(n).filter(Q)).forEach(function(t){_(t,e.class_error),i(t)}),t.update()}function t(t,e){var n,a,t=o(t);this._settings=t,this.loadingCount=0,B(t,this),n=t,a=this,Y&&window.addEventListener("online",function(){X(n,a)}),this.update(e)}var Y="undefined"!=typeof window,Z=Y&&!("onscroll"in window)||"undefined"!=typeof navigator&&/(gle|ing|ro)bot|crawl|spider/i.test(navigator.userAgent),tt=Y&&"IntersectionObserver"in window,et=Y&&"classList"in document.createElement("p"),nt=Y&&1<window.devicePixelRatio,at={elements_selector:".lazy",container:Z||Y?document:null,threshold:300,thresholds:null,data_src:"src",data_srcset:"srcset",data_sizes:"sizes",data_bg:"bg",data_bg_hidpi:"bg-hidpi",data_bg_multi:"bg-multi",data_bg_multi_hidpi:"bg-multi-hidpi",data_poster:"poster",class_applied:"applied",class_loading:"litespeed-loading",class_loaded:"litespeed-loaded",class_error:"error",class_entered:"entered",class_exited:"exited",unobserve_completed:!0,unobserve_entered:!1,cancel_on_exit:!0,callback_enter:null,callback_exit:null,callback_applied:null,callback_loading:null,callback_loaded:null,callback_error:null,callback_finish:null,callback_cancel:null,use_native:!1},ot="src",it="srcset",rt="sizes",ct="poster",lt="llOriginalAttrs",st="loading",ut="loaded",dt="applied",ft="error",_t="native",gt="data-",vt="ll-status",bt=[st,ut,dt,ft],pt=[ot],ht=[ot,ct],mt=[ot,it,rt],Et={IMG:function(t,e){h(t,function(t){y(t,mt),O(t,e)}),y(t,mt),O(t,e)},IFRAME:function(t,e){y(t,pt),A(t,ot,l(t,e.data_src))},VIDEO:function(t,e){a(t,function(t){y(t,pt),A(t,ot,l(t,e.data_src))}),y(t,ht),A(t,ct,l(t,e.data_poster)),A(t,ot,l(t,e.data_src)),t.load()}},It=["IMG","IFRAME","VIDEO"],yt={IMG:j,IFRAME:function(t){L(t,pt)},VIDEO:function(t){a(t,function(t){L(t,pt)}),L(t,ht),t.load()}},Lt=["IMG","IFRAME","VIDEO"];return t.prototype={update:function(t){var e,n,a,o=this._settings,i=W(t,o);{if(p(this,i.length),!Z&&tt)return q(o)?(e=o,n=this,i.forEach(function(t){-1!==Lt.indexOf(t.tagName)&&S(t,e,n)}),void p(n,0)):(t=this._observer,o=i,t.disconnect(),a=t,void o.forEach(function(t){a.observe(t)}));this.loadAll(i)}},destroy:function(){this._observer&&this._observer.disconnect(),K(this._settings).forEach(function(t){I(t)}),delete this._observer,delete this._settings,delete this.loadingCount,delete this.toLoadCount},loadAll:function(t){var e=this,n=this._settings;W(t,n).forEach(function(t){v(t,e),D(t,n,e)})},restoreAll:function(){var e=this._settings;K(e).forEach(function(t){P(t,e)})}},t.load=function(t,e){e=o(e);D(t,e)},t.resetStatus=function(t){i(t)},t}),function(t,e){"use strict";function n(){e.body.classList.add("litespeed_lazyloaded")}function a(){console.log("[LiteSpeed] Start Lazy Load"),o=new LazyLoad(Object.assign({},t.lazyLoadOptions||{},{elements_selector:"[data-lazyloaded]",callback_finish:n})),i=function(){o.update()},t.MutationObserver&&new MutationObserver(i).observe(e.documentElement,{childList:!0,subtree:!0,attributes:!0})}var o,i;t.addEventListener?t.addEventListener("load",a,!1):t.attachEvent("onload",a)}(window,document);</script><script data-no-optimize="1">window.litespeed_ui_events=window.litespeed_ui_events||["mouseover","click","keydown","wheel","touchmove","touchstart"];var urlCreator=window.URL||window.webkitURL;function litespeed_load_delayed_js_force(){console.log("[LiteSpeed] Start Load JS Delayed"),litespeed_ui_events.forEach(e=>{window.removeEventListener(e,litespeed_load_delayed_js_force,{passive:!0})}),document.querySelectorAll("iframe[data-litespeed-src]").forEach(e=>{e.setAttribute("src",e.getAttribute("data-litespeed-src"))}),"loading"==document.readyState?window.addEventListener("DOMContentLoaded",litespeed_load_delayed_js):litespeed_load_delayed_js()}litespeed_ui_events.forEach(e=>{window.addEventListener(e,litespeed_load_delayed_js_force,{passive:!0})});async function litespeed_load_delayed_js(){let t=[];for(var d in document.querySelectorAll('script[type="litespeed/javascript"]').forEach(e=>{t.push(e)}),t)await new Promise(e=>litespeed_load_one(t[d],e));document.dispatchEvent(new Event("DOMContentLiteSpeedLoaded")),window.dispatchEvent(new Event("DOMContentLiteSpeedLoaded"))}function litespeed_load_one(t,e){console.log("[LiteSpeed] Load ",t);var d=document.createElement("script");d.addEventListener("load",e),d.addEventListener("error",e),t.getAttributeNames().forEach(e=>{"type"!=e&&d.setAttribute("data-src"==e?"src":e,t.getAttribute(e))});let a=!(d.type="text/javascript");!d.src&&t.textContent&&(d.src=litespeed_inline2src(t.textContent),a=!0),t.after(d),t.remove(),a&&e()}function litespeed_inline2src(t){try{var d=urlCreator.createObjectURL(new Blob([t.replace(/^(?:<!--)?(.*?)(?:-->)?$/gm,"$1")],{type:"text/javascript"}))}catch(e){d="data:text/javascript;base64,"+btoa(t.replace(/^(?:<!--)?(.*?)(?:-->)?$/gm,"$1"))}return d}</script><script data-optimized="1" type="litespeed/javascript" data-src="https://techamplifiers.com/wp-content/litespeed/js/d0ff985d04bb2d8f427563a6e257b8f6.js?ver=9a9b4"></script></body>
Feature 9: Stories
- Key Functionalities
- Upload Stories: Users can upload temporary photos or videos (stories).
- View Stories: Users can view stories from other users.
Story Expiry: Stories expire after 24 hours.
- Story Model
The Story model in posts/models.py:
					from django.utils import timezone

class Story(models.Model):
    user = models.ForeignKey(User, on_delete=models.CASCADE, related_name="stories")
    media = models.FileField(upload_to='stories/')
    created_at = models.DateTimeField(auto_now_add=True)

    def is_expired(self):
        return timezone.now() - self.created_at > timezone.timedelta(hours=24)

    def __str__(self):
        return f"Story by {self.user.username}"
- Story Views
Add views for stories in posts/views.py:
					from django.shortcuts import render, redirect
from .models import Story

@login_required
def upload_story(request):
    if request.method == 'POST' and request.FILES.get('media'):
        Story.objects.create(user=request.user, media=request.FILES['media'])
        return redirect('home')
    return render(request, 'posts/upload_story.html')

@login_required
def view_story(request, story_id):
    story = get_object_or_404(Story, id=story_id)
    if story.is_expired():
        return redirect('home')
    return render(request, 'posts/view_story.html', {'story': story})
- Story Templates
- upload_story.html: Template for uploading stories.
- view_story.html: Template for viewing stories.
Templates/posts/upload_story.html:
<!DOCTYPE html>
<html lang=”en”>
<head>
<meta charset=”UTF-8″>
<meta name=”viewport” content=”width=device-width, initial-scale=1.0″>
<title>Instagram Upload Story</title>
<style>
/* Full-page styling */
body, html {
margin: 0;
padding: 0;
height: 100%;
display: flex;
justify-content: center;
align-items: center;
background-color: black;
color: white;
font-family: Arial, sans-serif;
}
/* Upload container */
.upload-container {
background: rgba(255, 255, 255, 0.1);
padding: 20px;
border-radius: 10px;
box-shadow: 0px 0px 10px rgba(255, 255, 255, 0.2);
text-align: center;
width: 350px;
}
/* Input styling */
input[type=”file”] {
margin: 10px 0;
padding: 5px;
background: rgba(255, 255, 255, 0.1);
border: none;
color: white;
cursor: pointer;
}
input[type=”file”]::-webkit-file-upload-button {
background: #0095f6;
color: white;
padding: 8px 15px;
border: none;
border-radius: 5px;
cursor: pointer;
font-weight: bold;
}
input[type=”file”]::-webkit-file-upload-button:hover {
background: #0074cc;
}
/* Upload button */
.upload-btn {
padding: 10px 20px;
background: #0095f6;
border: none;
border-radius: 5px;
color: white;
font-weight: bold;
cursor: pointer;
margin-top: 10px;
width: 100%;
}
.upload-btn:hover {
background: #0074cc;
}
/* Home button */
.home-btn {
position: absolute;
top: 20px;
right: 20px;
padding: 8px 15px;
background: rgba(255, 255, 255, 0.2);
color: white;
border: none;
border-radius: 5px;
cursor: pointer;
text-decoration: none;
font-weight: bold;
}
.home-btn:hover {
background: rgba(255, 255, 255, 0.4);
}
</style>
</head>
<body>
<!– Home Button –>
<a href=”{% url ‘home’ %}” class=”home-btn”>Home</a>
<div class=”upload-container”>
<h2>Upload a Story</h2>
<!– Story Upload Form –>
<form method=”POST” enctype=”multipart/form-data”>
{% csrf_token %}
<label for=”media”>Select an Image or Video:</label>
<input type=”file” name=”media” accept=”image/*, video/*” required>
<button type=”submit” class=”upload-btn”>Upload</button>
</form>
</div>
<!– Check if the user has an active story and show an alert –>
{% if user_has_active_story %}
<script>
alert(“You already have an active story. Please wait until it expires before uploading a new one.”);
window.location.href = “{% url ‘home’ %}”;
</script>
{% endif %}
</body>
</html>
Conclusion
Building an Instagram clone using Django has been an exciting and rewarding journey. Throughout this project, we’ve implemented a wide range of features that mimic the core functionality of Instagram, including:
- User Authentication: Secure registration, login, and logout.
- Post Creation: Uploading images with captions and hashtags, editing, and deleting posts.
- Interactions: Liking posts and adding comments.
- Dark Mode: A user-friendly toggle for light and dark themes.
- Profile Management: Editing profiles and viewing followers/following lists.
- Reels: Uploading and viewing short videos.
- Messaging: Real-time chat between users.
- Stories: Sharing temporary photos and videos.
This project not only demonstrates the power of Django as a web framework but also showcases how to build a scalable and feature-rich social media platform. By breaking down the implementation into manageable features, we’ve created a modular and maintainable codebase that can be extended further.
Key Takeaways
- Django is Versatile:
- Django’s built-in features, such as the ORM, authentication system, and template engine, make it an excellent choice for building complex web applications like Instagram.
- Modular Design:
- By dividing the project into smaller features (e.g., authentication, posts, reels, messaging), we ensured a clean and organized codebase.
- User Experience Matters:
- Features like dark mode, carousels for multiple images, and real-time messaging enhance the user experience and make the platform more engaging.
- Testing is Crucial:
- Thoroughly testing each feature ensures a bug-free and seamless user experience.
- Scalability:
- The project is designed to be scalable, with room for additional features like notifications, live streaming, and more.
What’s Next?
While this Instagram clone is fully functional, there’s always room for improvement and expansion. Here are some ideas for future enhancements:
- Notifications: Notify users about new likes, comments, and followers.
- Live Streaming: Implement live video streaming functionality.
- Explore Page: Add an explore page to discover new posts and users.
- Advanced Search: Allow users to search for posts, hashtags, and profiles.
- Performance Optimization: Optimize the application for faster load times and better scalability.
Final Thoughts
Building an Instagram clone from scratch is a challenging but incredibly rewarding project. It not only helps you understand the intricacies of web development but also gives you hands-on experience with Django, one of the most powerful web frameworks available today. Whether you’re a beginner looking to learn Django or an experienced developer exploring social media platforms, this project provides valuable insights and practical knowledge.