
Wireless Raspberry Pi Control Guide: 7 Easy Steps for Wireless Raspberry Pi Control for Beginners
f you’re looking to explore wireless Raspberry Pi control, you’re in the right place. Whether you’re working on home automation, media servers, or robotics, this guide will walk you through connecting and controlling your Raspberry Pi remotely without any physical cable connection.
We’ll also cover how to control Raspberry Pi via smartphone, set up VNC viewer, and ensure you’re getting the most from your Raspberry Pi Wi‑Fi automation setup.
Why Wireless Control?
Using a wireless setup enhances portability, eliminates cable clutter, and lets you access your Raspberry Pi from virtually anywhere on the same network. Perfect for headless setups (no monitor, keyboard, or mouse), it’s the core of a great wireless IoT Raspberry Pi experience.
Step 1: Install the Operating System.
Start by flashing Raspberry Pi OS onto a microSD card using software like Raspberry Pi Imager. Choose the OS version suitable for headless operation.
Tip: Use Raspberry Pi OS Lite for minimal setup or the full version if you want GUI access later via VNC.
Step 2: Configure Wi-Fi and Enable SSH
Create a file named
wpa_supplicant.confin the boot partition of your SD card:ctrl_interface=DIR=/var/run/wpa_supplicant GROUP=netdev update_config=1 country=IN network={ ssid="Your_WiFi_Name" psk="Your_WiFi_Password" }Also, create a blank file named
ssh(no extension) to enable remote SSH access.Important: Both files must be placed in the root of the SD card before inserting it into the Raspberry Pi.
Step 3: Check for a Network Connection.
Once powered on, your Raspberry Pi should connect to the Wi-Fi automatically. Use the command prompt on your laptop:
ping raspberrypi.local
If that fails, try using the IP address directly:
ping 192.168.x.x

Step 4: Find the Raspberry Pi's IP Address using Fing(Optional).
Use the Fing app on your smartphone to scan your Wi-Fi network:
Download Fing App on your phone.
Connect your phone to the same Wi-Fi.
Look for “raspberrypi” in the scanned device list.
Note its IP address for further steps.

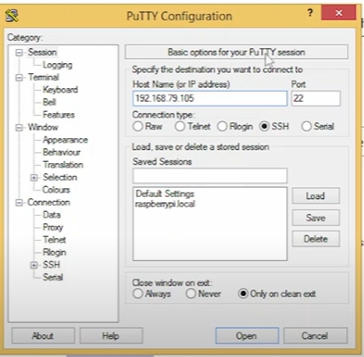
Step 5: Download and install Putty.
Download Putty for Windows.
Open Putty
Enter
raspberrypi.localor the Pi’s IP addressUse SSH port 22 and click Open
Username:
pi| Password:raspberry
You now have remote Raspberry Pi control via terminal.
Step 6 : set up a VNC server on your Raspberry Pi.
Once logged in via SSH:
					sudo apt update
sudo apt install tightvncserver
vncserver
Set up a new password when prompted. This allows GUI-based access to your Pi.
Optional: You can set VNC server to run on boot using
crontabor systemd.
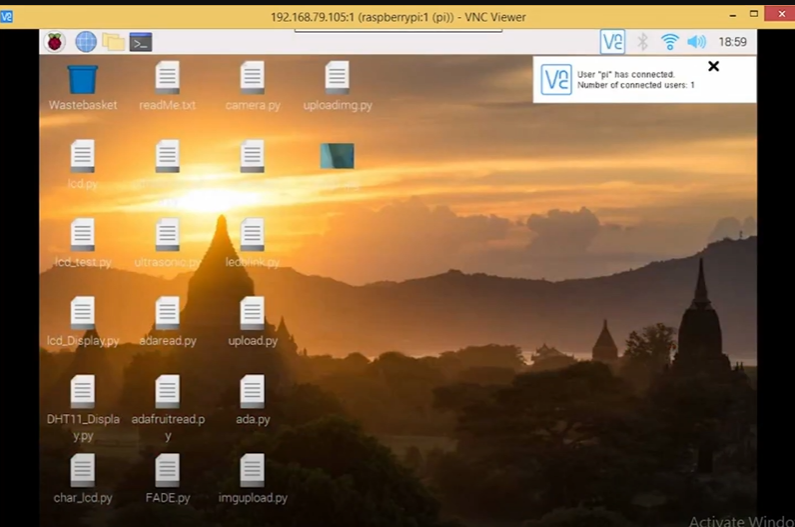
Step 7: Install and launch VNC Viewer.
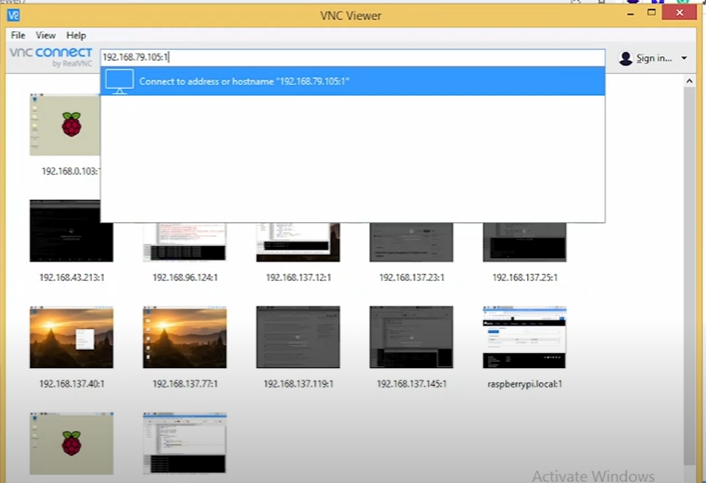
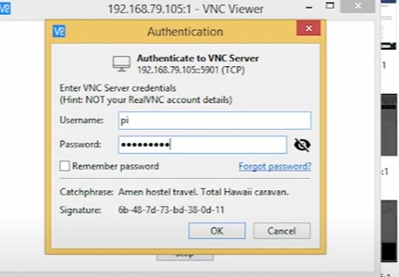
Download RealVNC Viewer.
Open VNC Viewer
Type your Pi’s IP followed by
:1(e.g.,192.168.1.100:1)Use same login:
pi/raspberry
You now have full graphical access to your Raspberry Pi from any system on the network.
Final Thoughts
With just a few simple steps, you’ve unlocked wireless Raspberry Pi control from your laptop or smartphone. Whether you’re into remote Raspberry Pi control for automation or just experimenting with wireless IoT Raspberry Pi applications, this guide sets the foundation.
For advanced automation projects, you can explore tools like:
These tools offer drag-and-drop programming for powerful IoT setups.
🔗 Useful Links
Now you’re ready to build, automate, and experiment — wirelessly.
You can watch this as well for reference
🔗 Similar Blogs You Might Like
1. What is an Arduino? A Beginner’s Guide
2. Wireless Raspberry Pi Control – A Complete Guide
3. IoT with ESP32 and ThingSpeak – Real-time Data Logging
4. Arduino void setup() and void loop() Explained
5. Introduction to IoT – Basics and Applications
6. How to Add Library in Arduino IDE – A Step-by-Step Guide